|
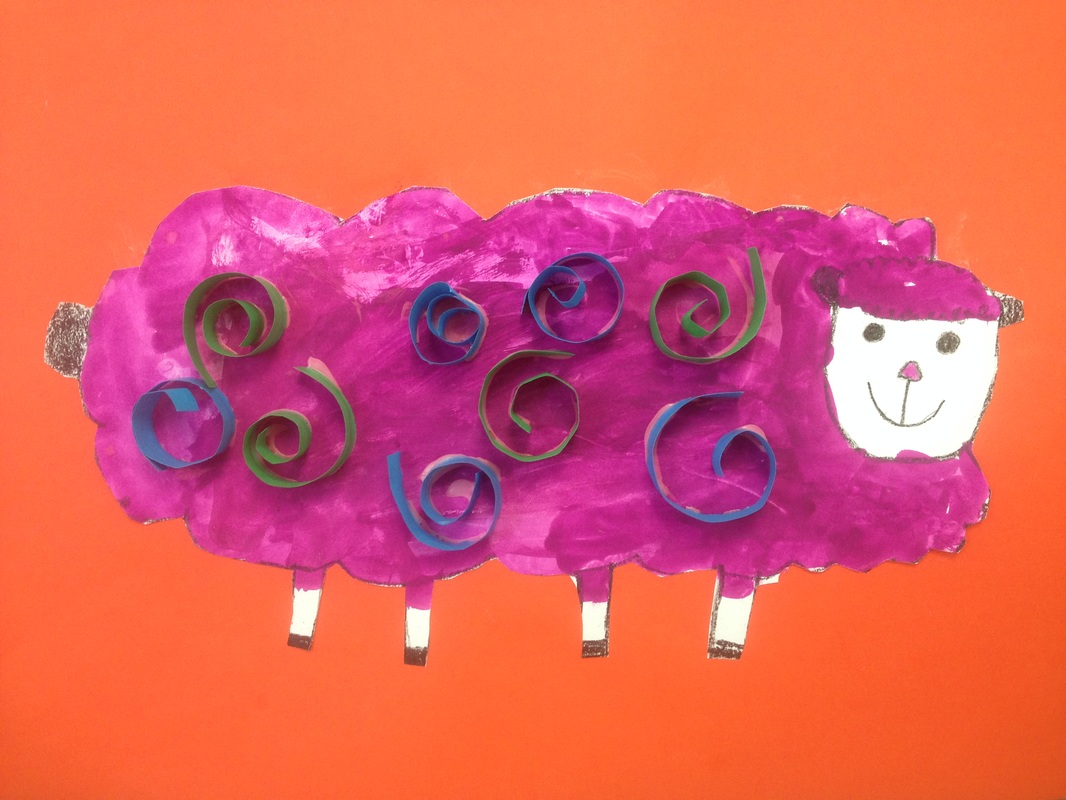
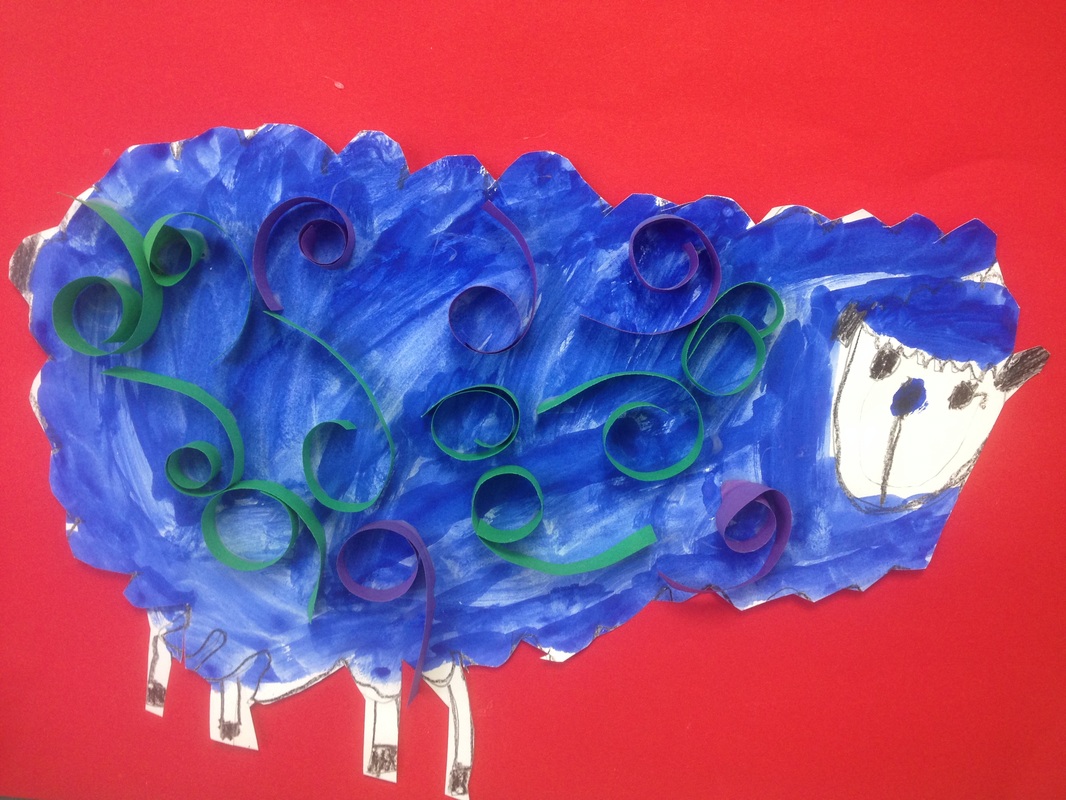
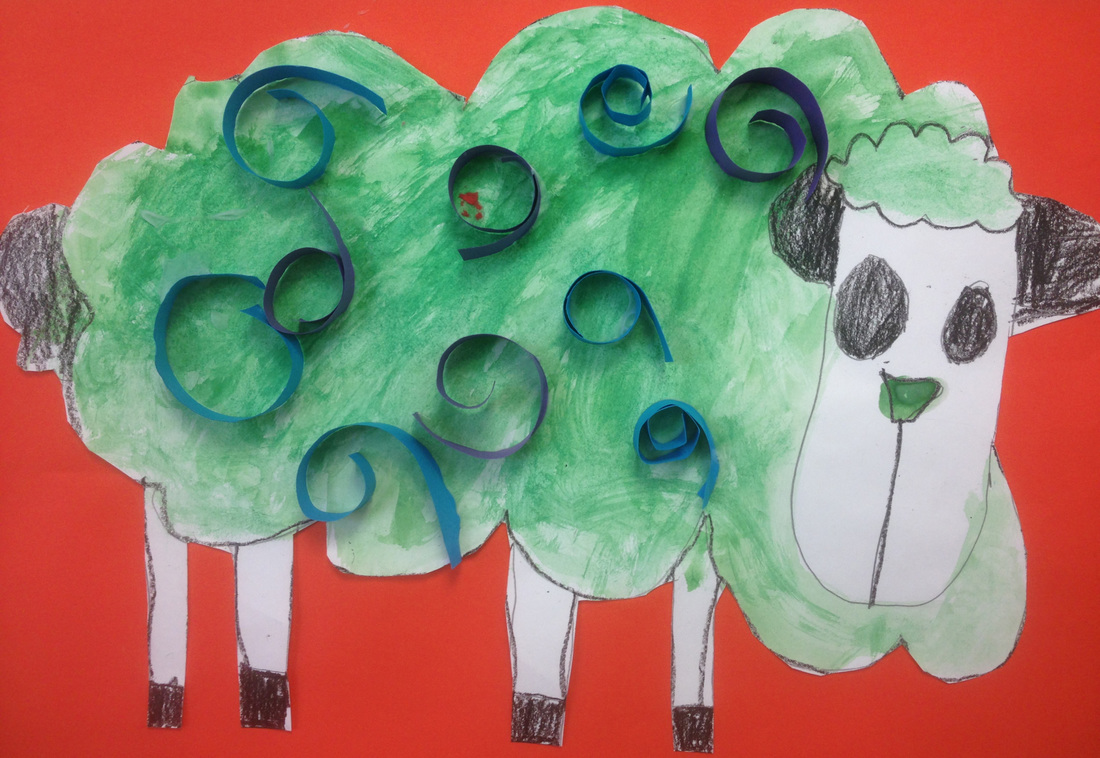
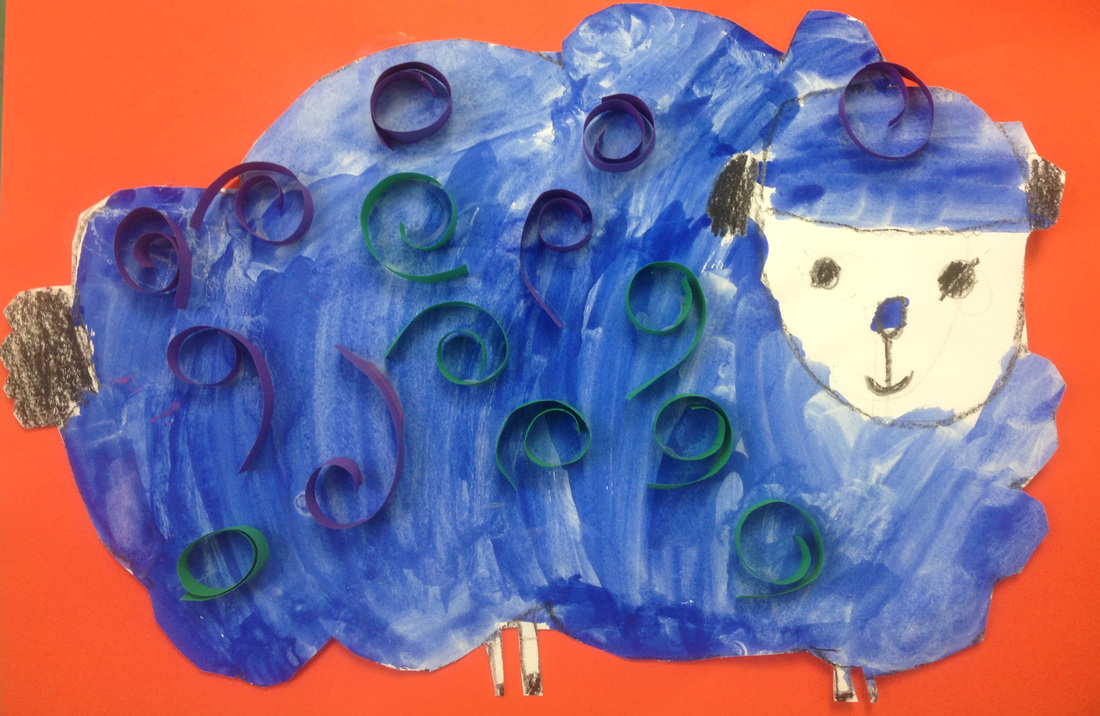
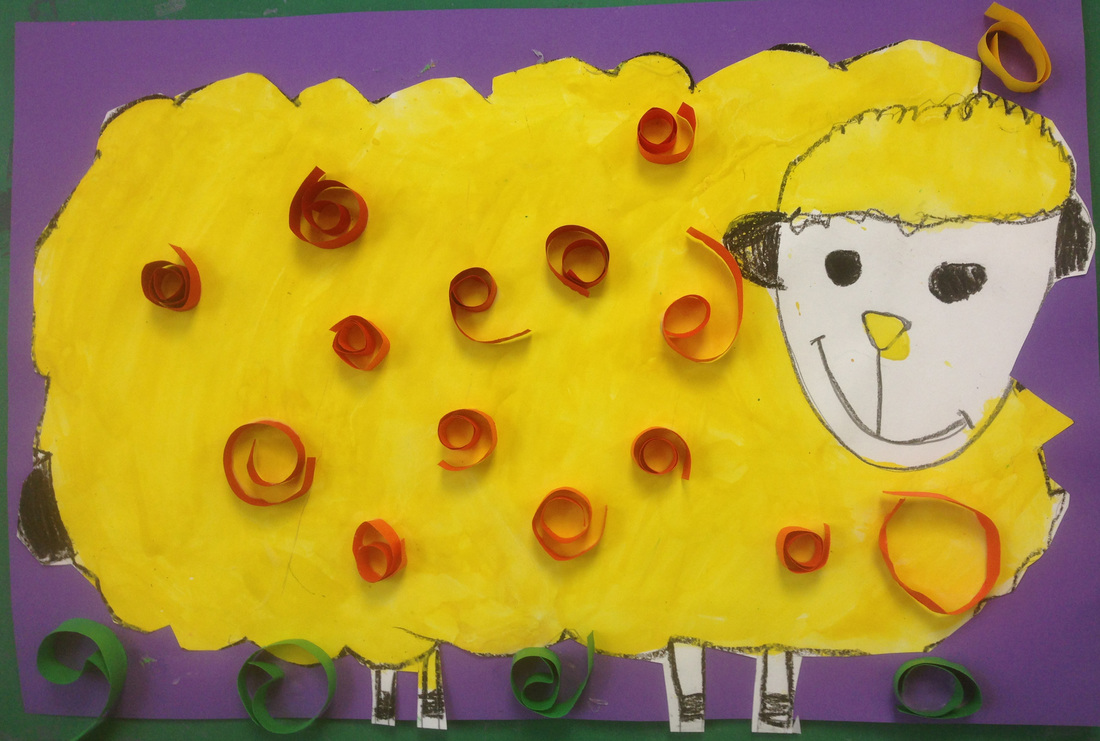
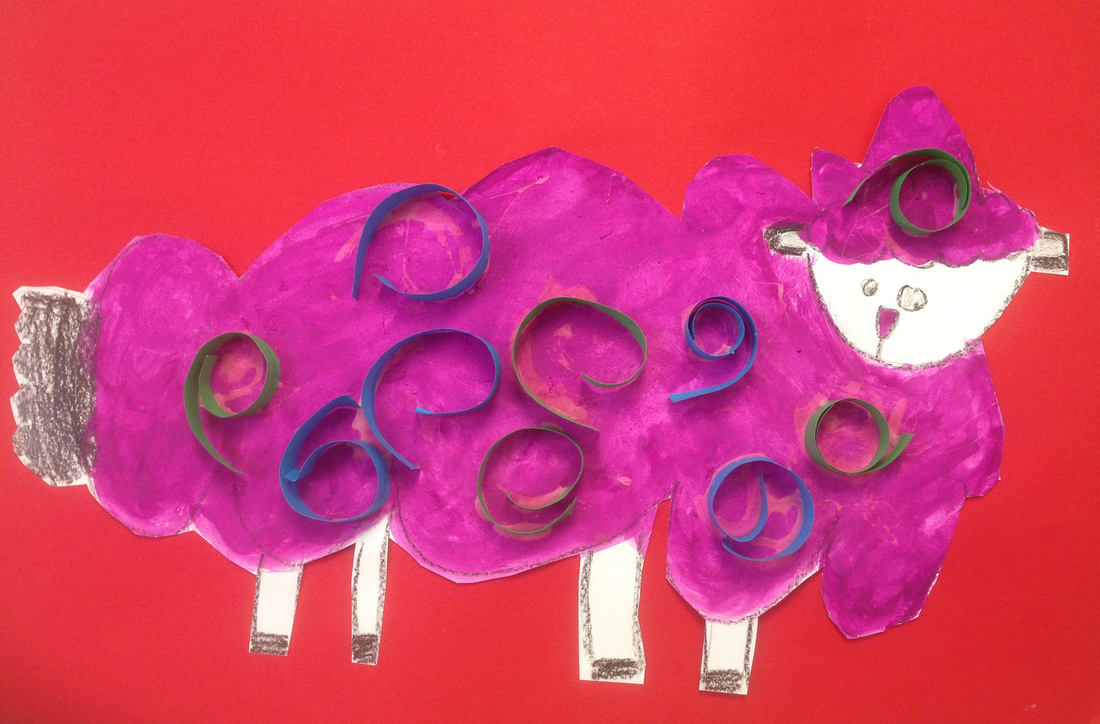
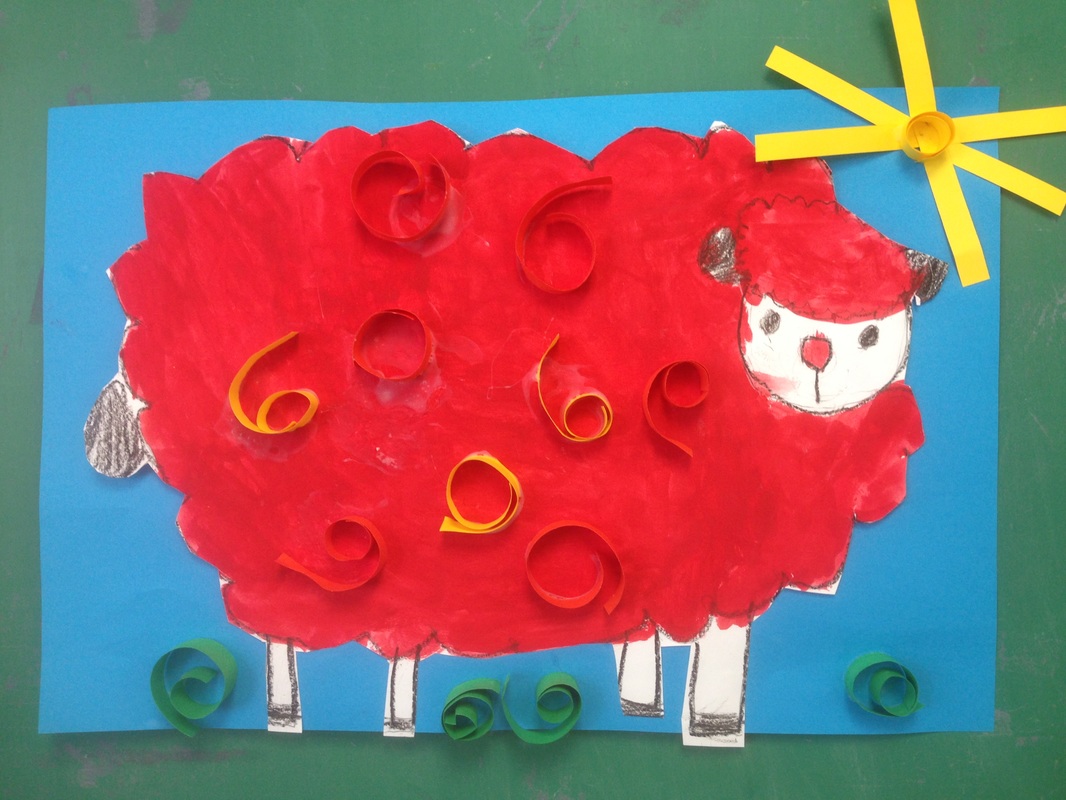
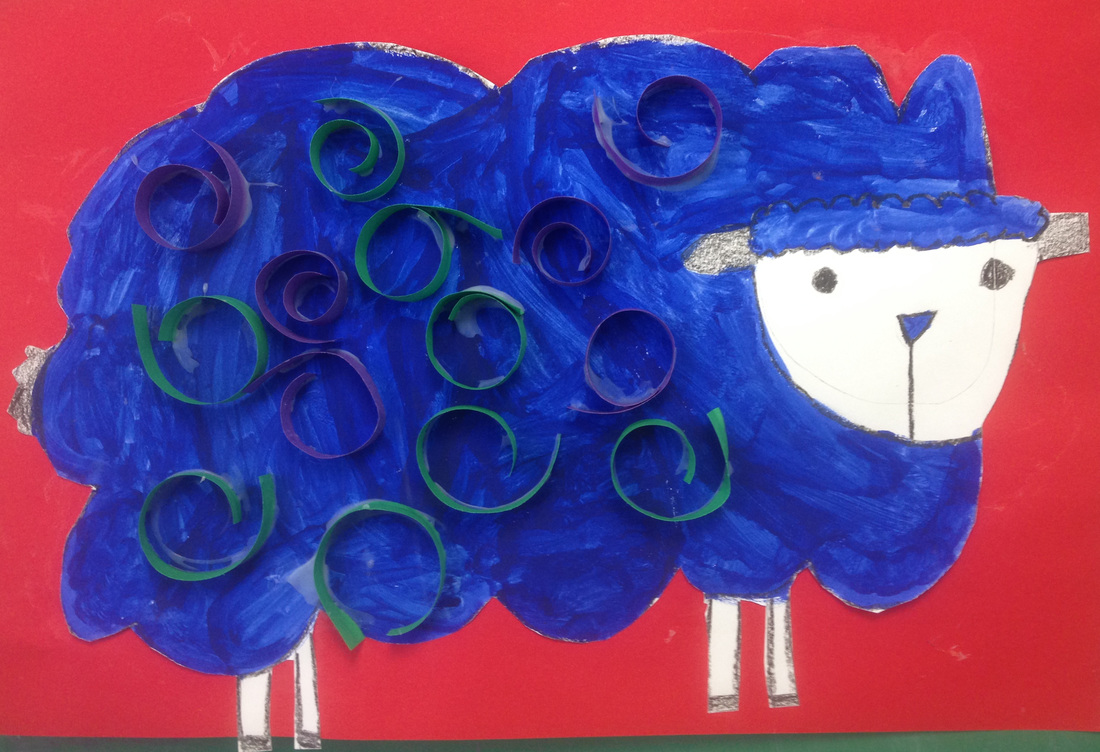
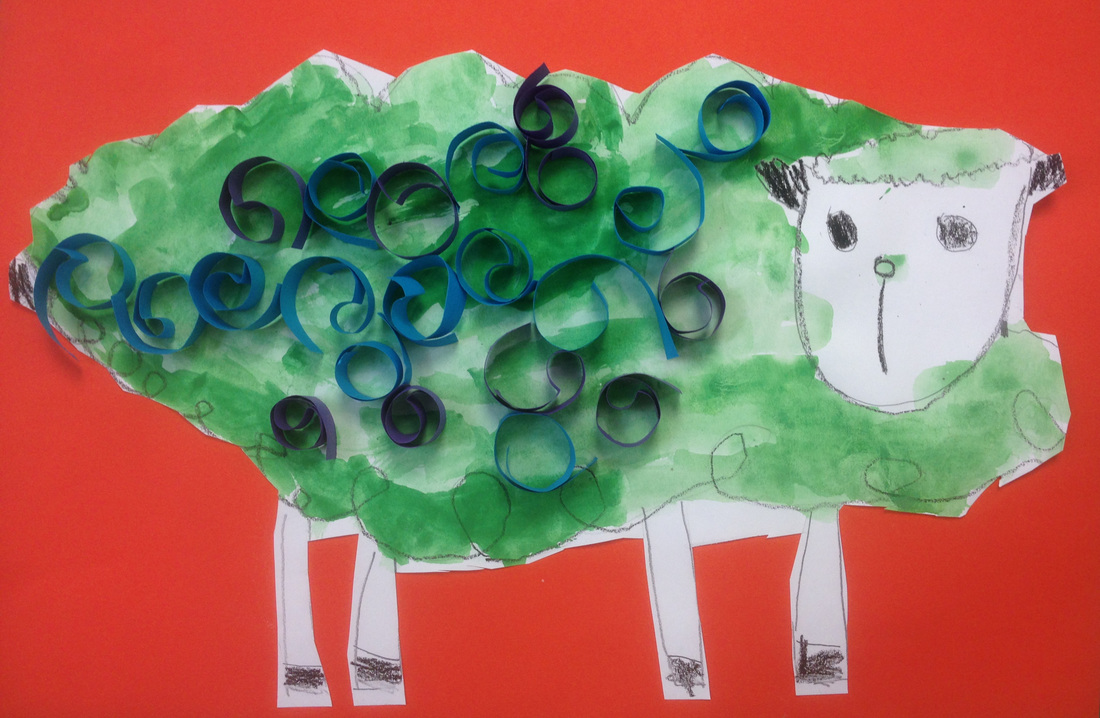
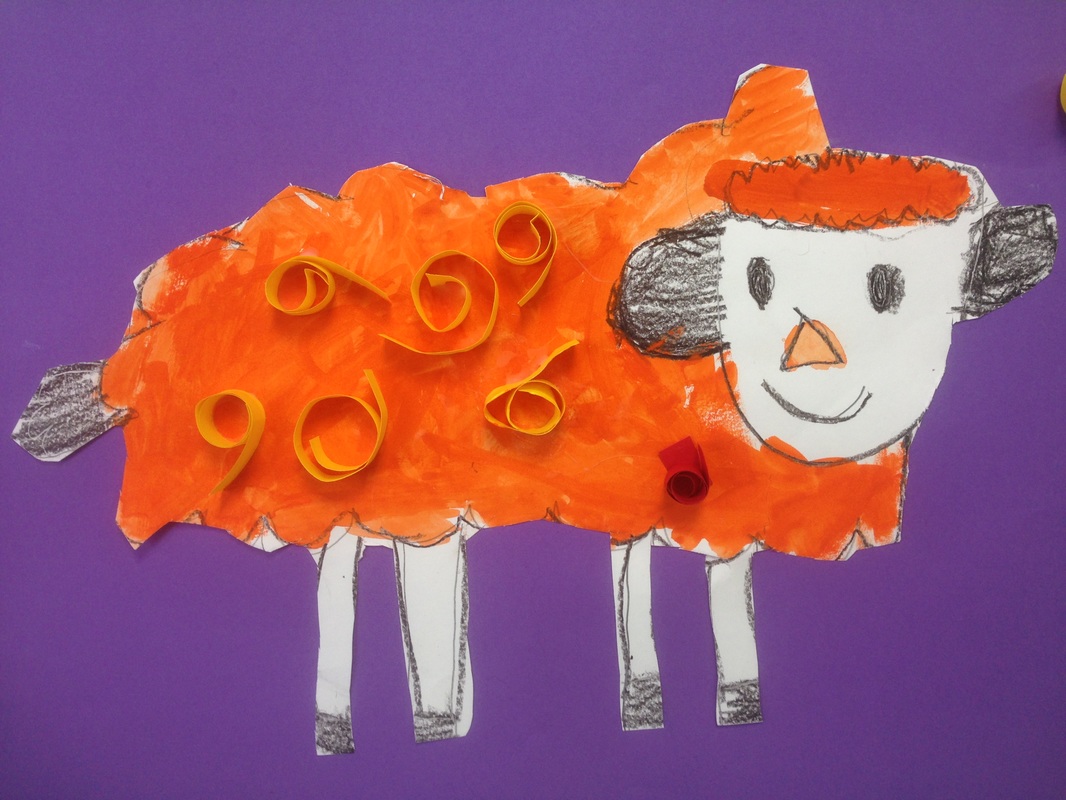
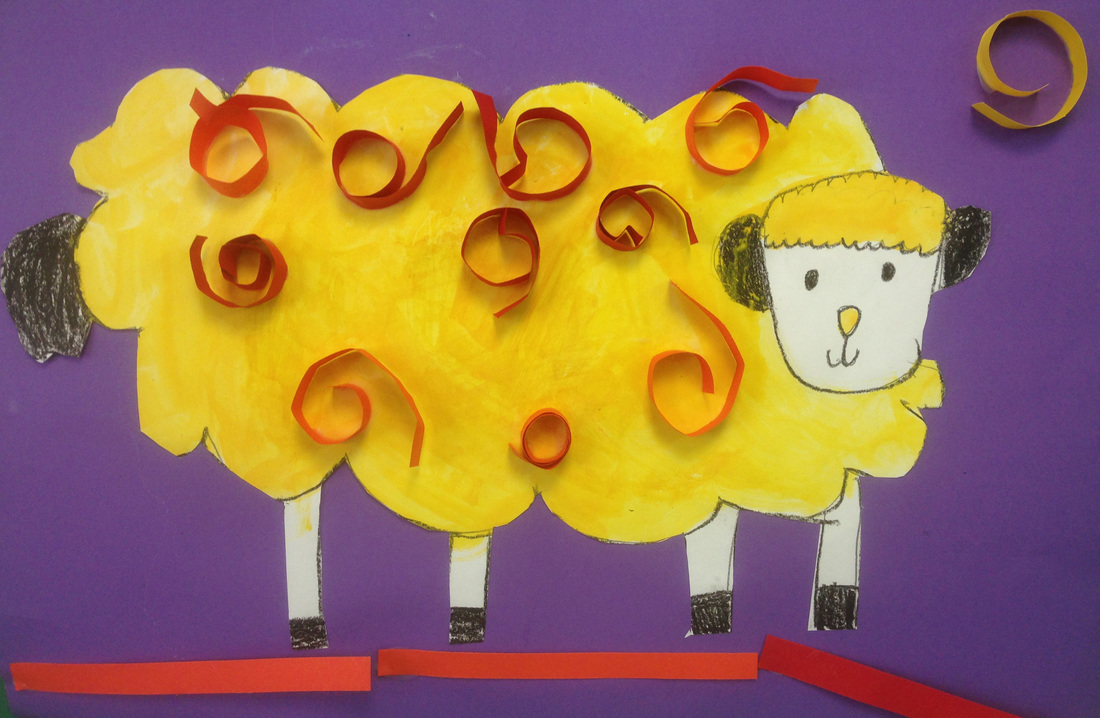
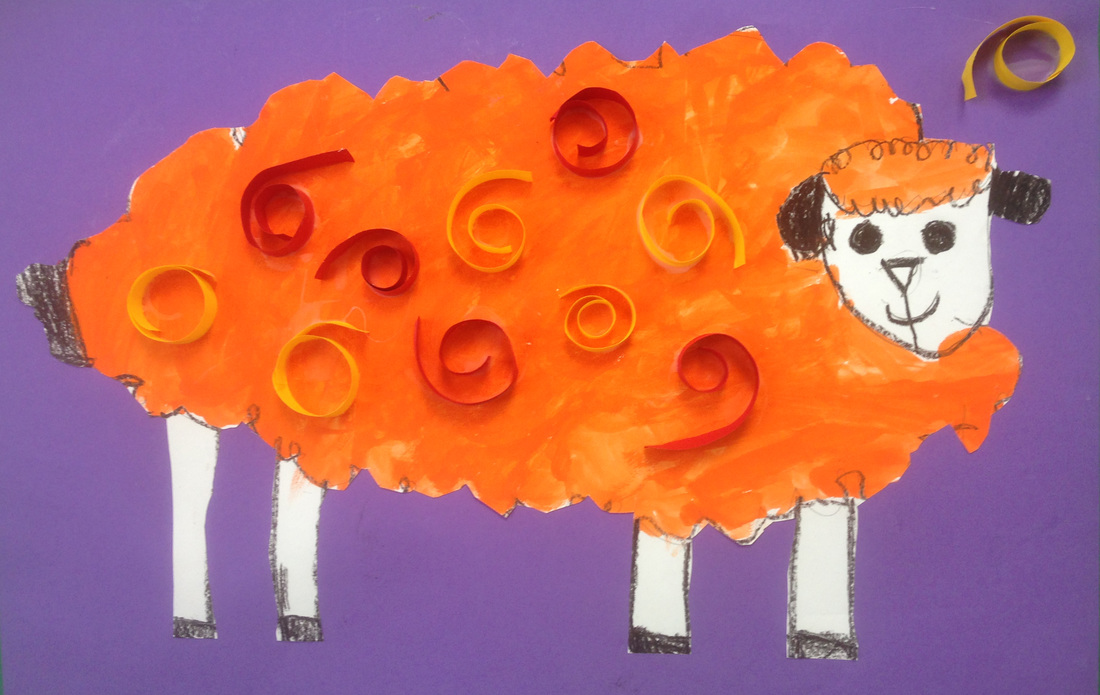
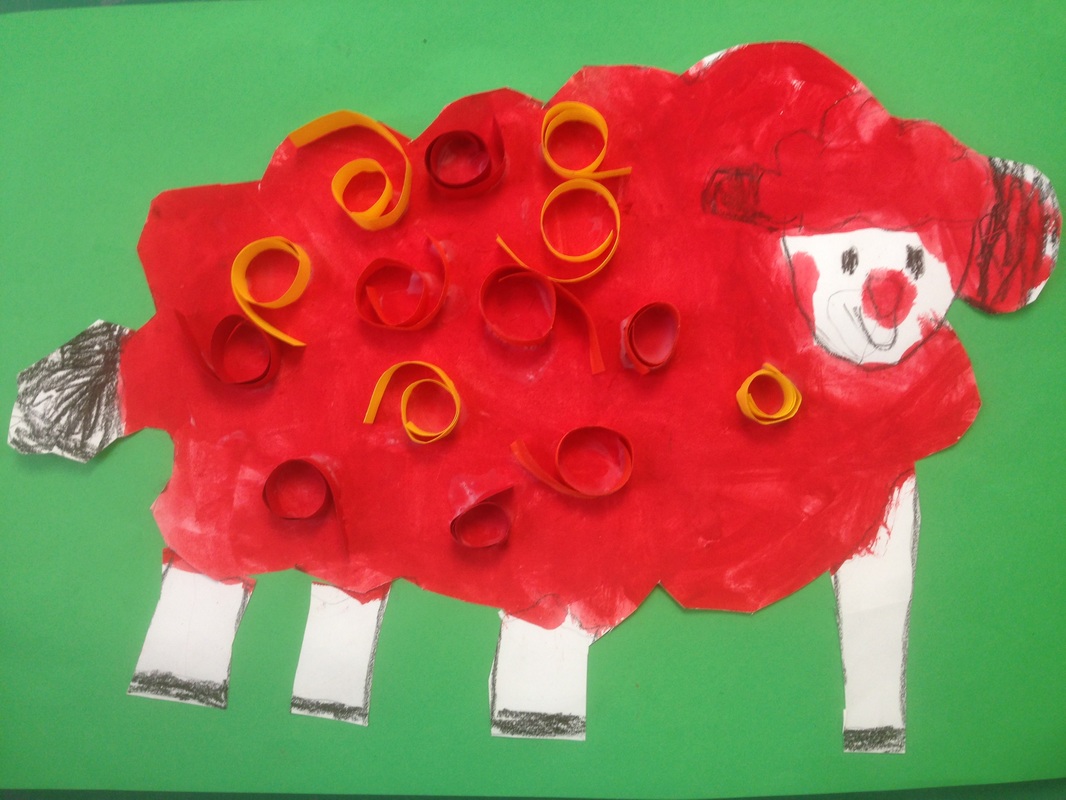
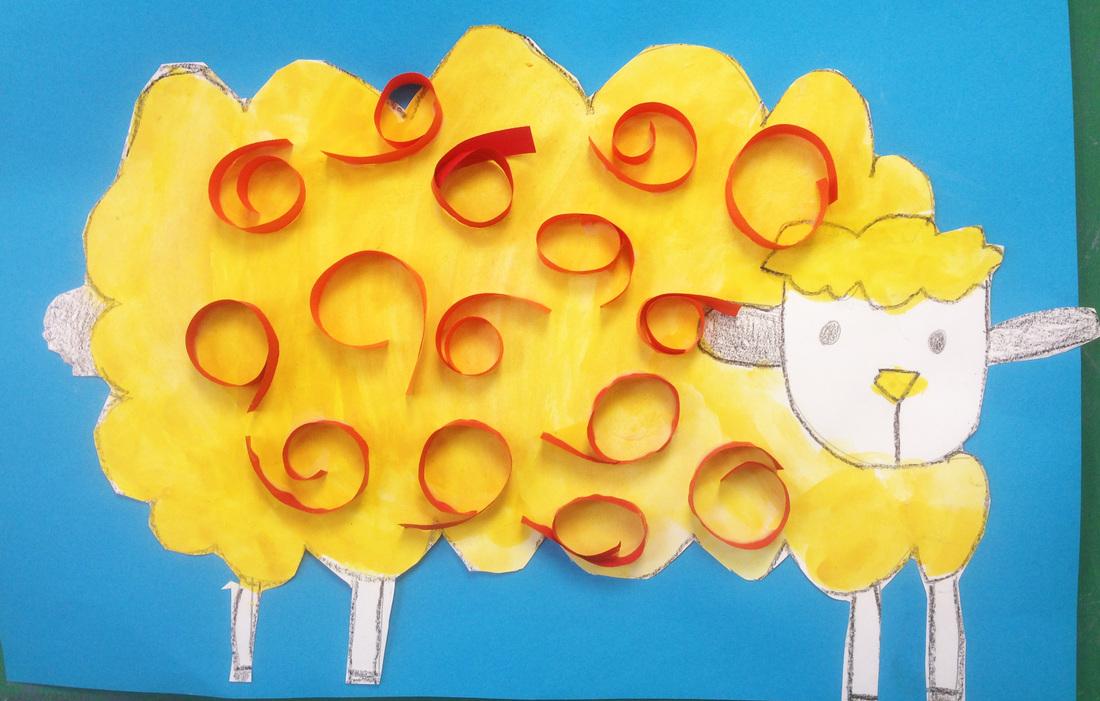
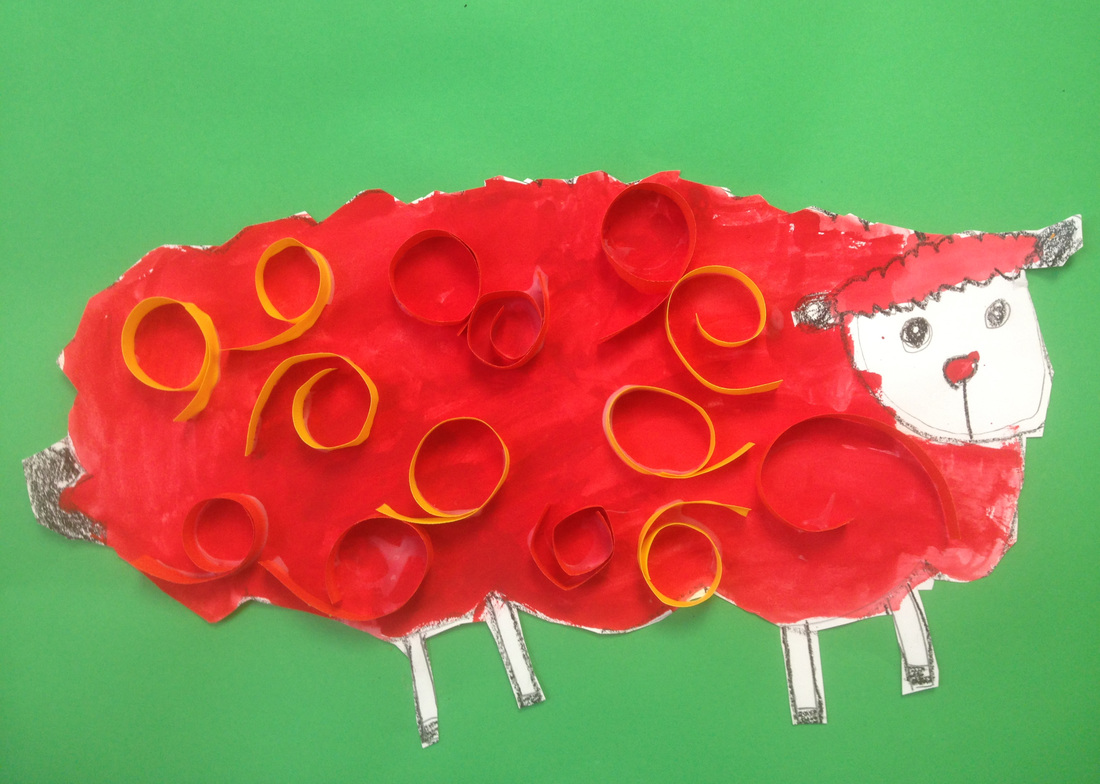
This lesson began by reading the Eric Carle book "The Artist Who Painted a Blue Horse." Here is a fantastic YouTube video of the author/artist discussing his book. Students had been discussing the Chinese New Year in their classrooms, so I wanted to create a lesson that tied into what they were learning. I found out that 2015 was the year of the sheep and came up with this new project. After discussing "The Artist Who Painted a Blue Horse," we took out the interactive color wheel and reviewed warm and cool colors. We had started talking about the warm and cool color groups in December, after making the color wheel turkeys. Students completed color wheel warm/cool color worksheets, and had then done an imaginative drawing using warm colors on one side of their paper, and cool on the other. 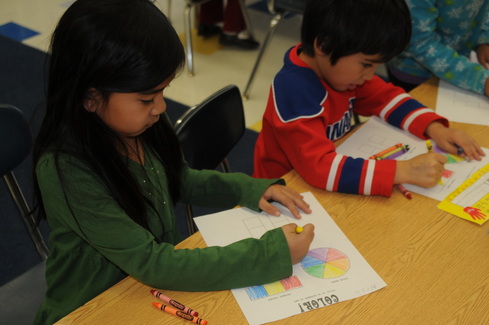 
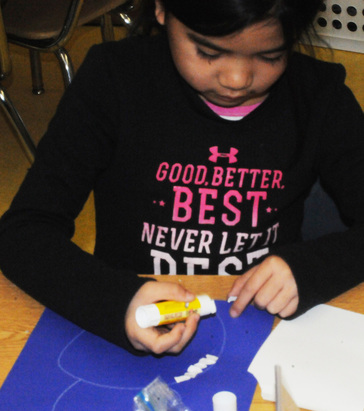
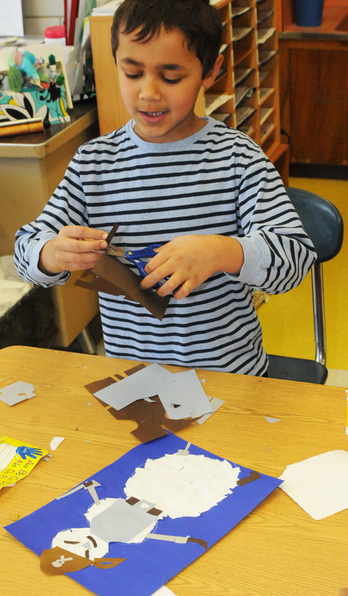
The first step of the project was for students to follow a step-by-step demonstration of how to draw their sheep. I used a small white board to draw each step so I could walk around to each table while I was demonstrating and the students were drawing. Once these pencil drawings were complete, students used black crayons to trace over all of their pencil lines. 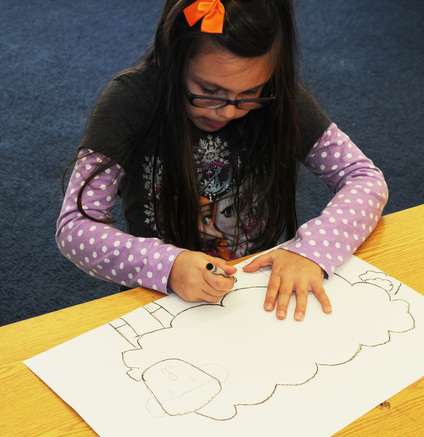 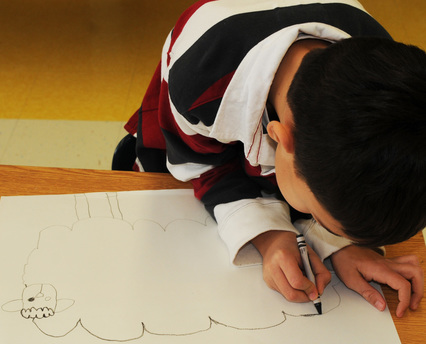 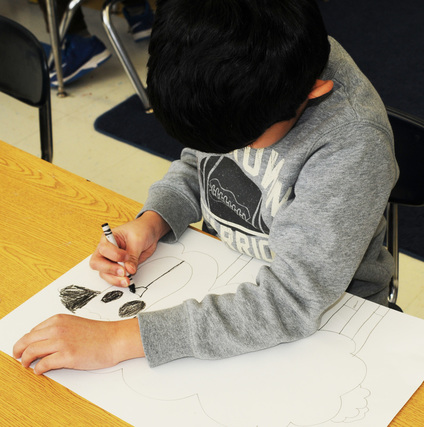 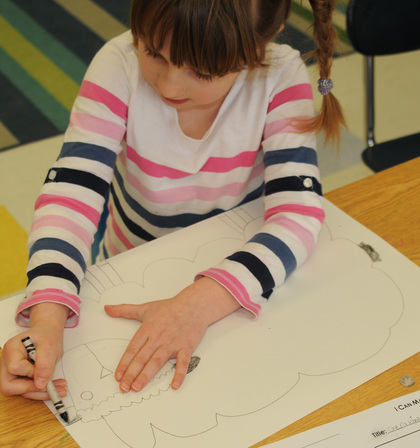 The next step was to paint. Although nothing is more important to me than letting students make their own choices for their artwork, I was concerned that everyone would want to paint their sheep the same color. To make sure that that didn't happen, I put equal numbers of each color in a hat and had students close their eyes and reach in and grab one. The loved the fun of it, and it worked out really well. Before painting, I did a demonstration with tempera cakes since the first graders had not used them before. They loved using them, and did a wonderful job painting their sheep! 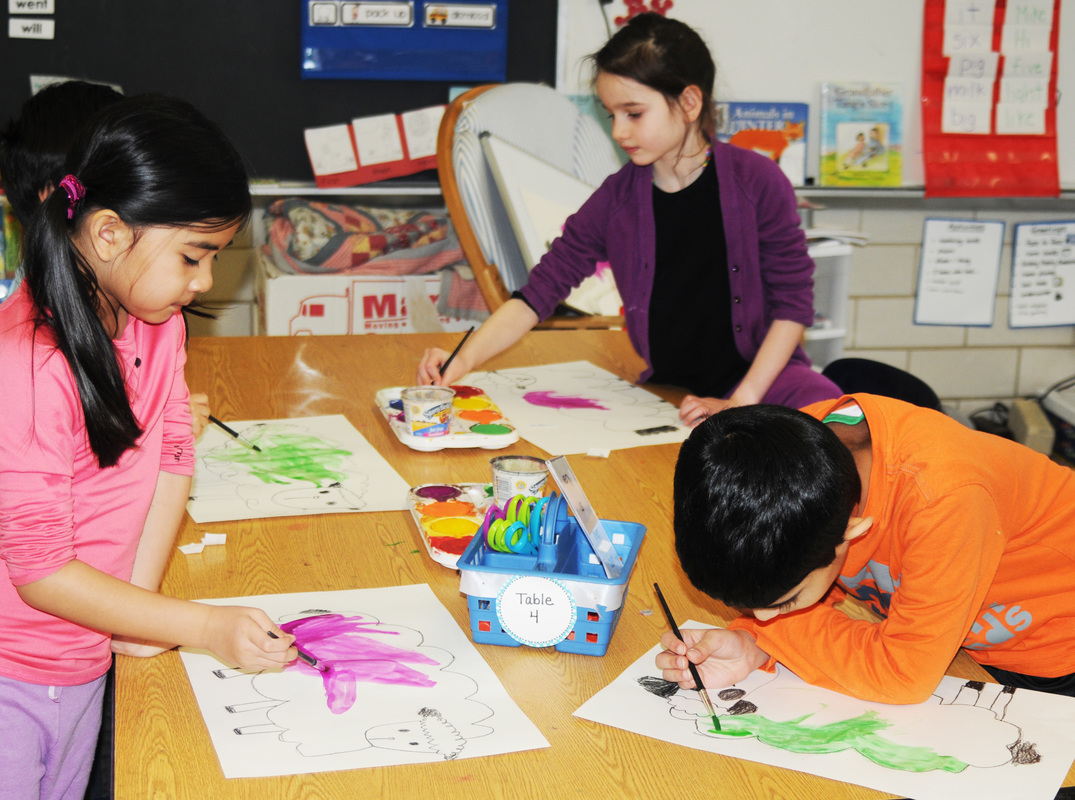 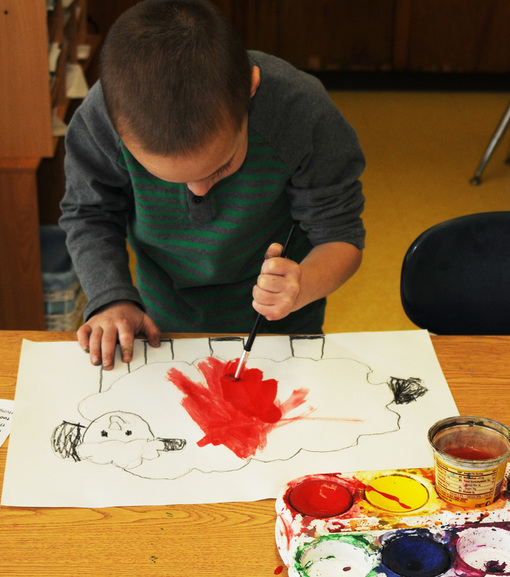 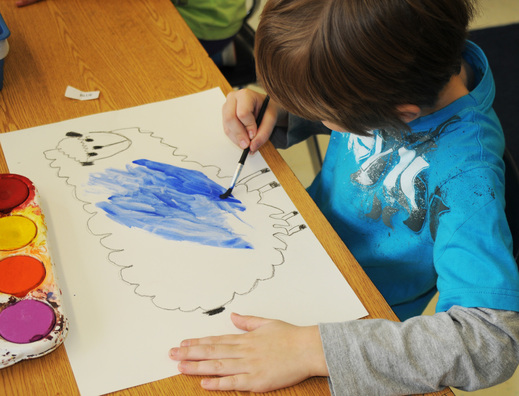 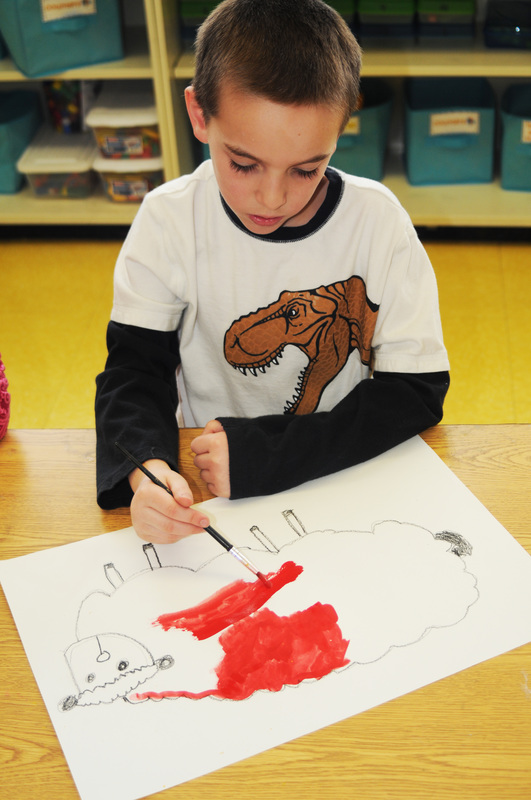 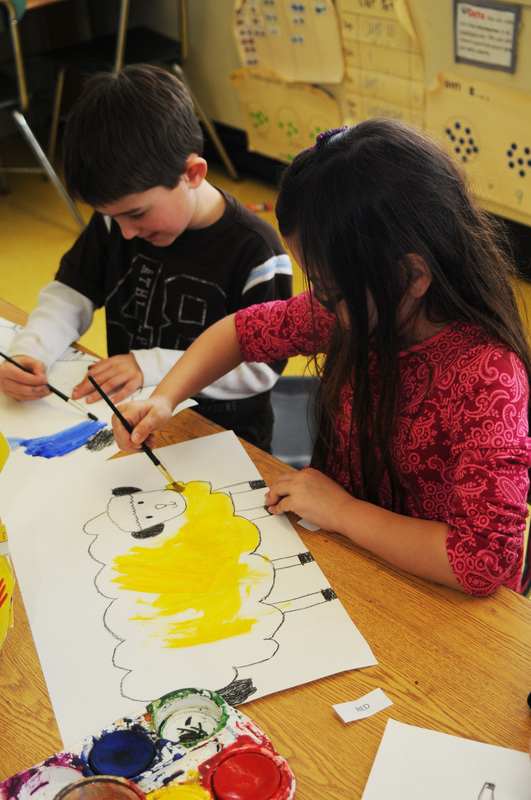 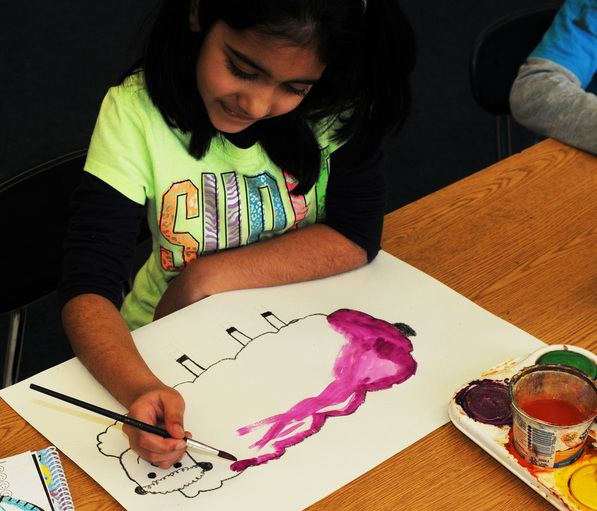 Once the paintings had dried, the next step was to curl 1/2" wide strips of paper around a pencil to make "curly-Qs" for the wool. Before we began that process, I decided that instead of leaving the background white, as was my original intent, I would have students cut their sheep out and mount them on colored paper of their choice. If their sheep was a cool color, they could choose any warm color to mount it on and if their sheep was a warm color, they could choose any cool color to mount it on. 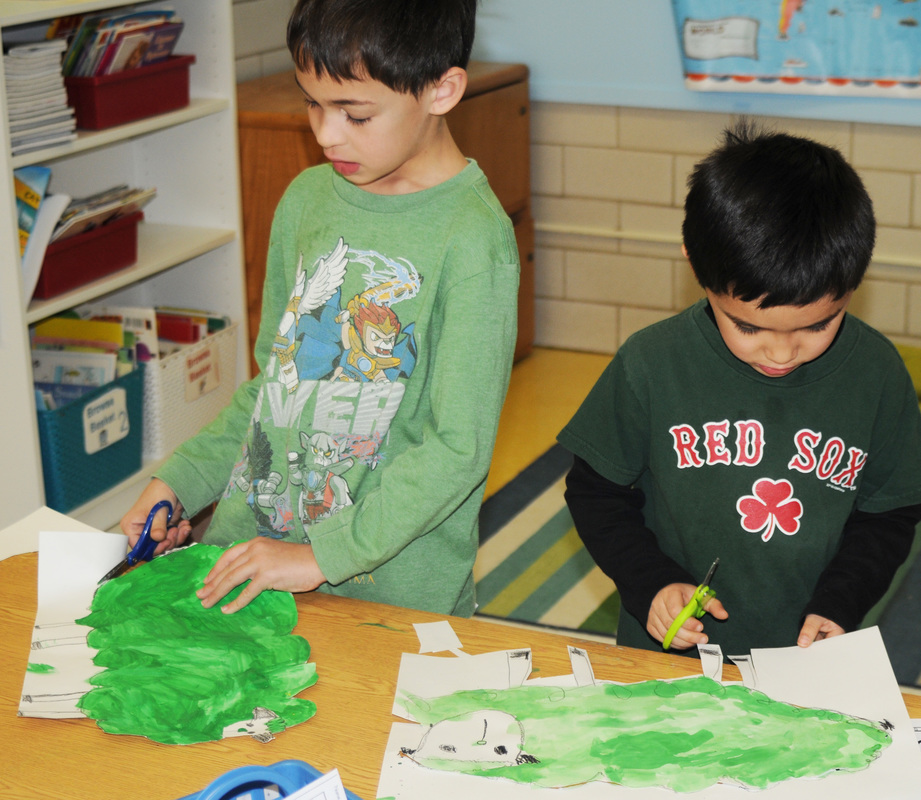 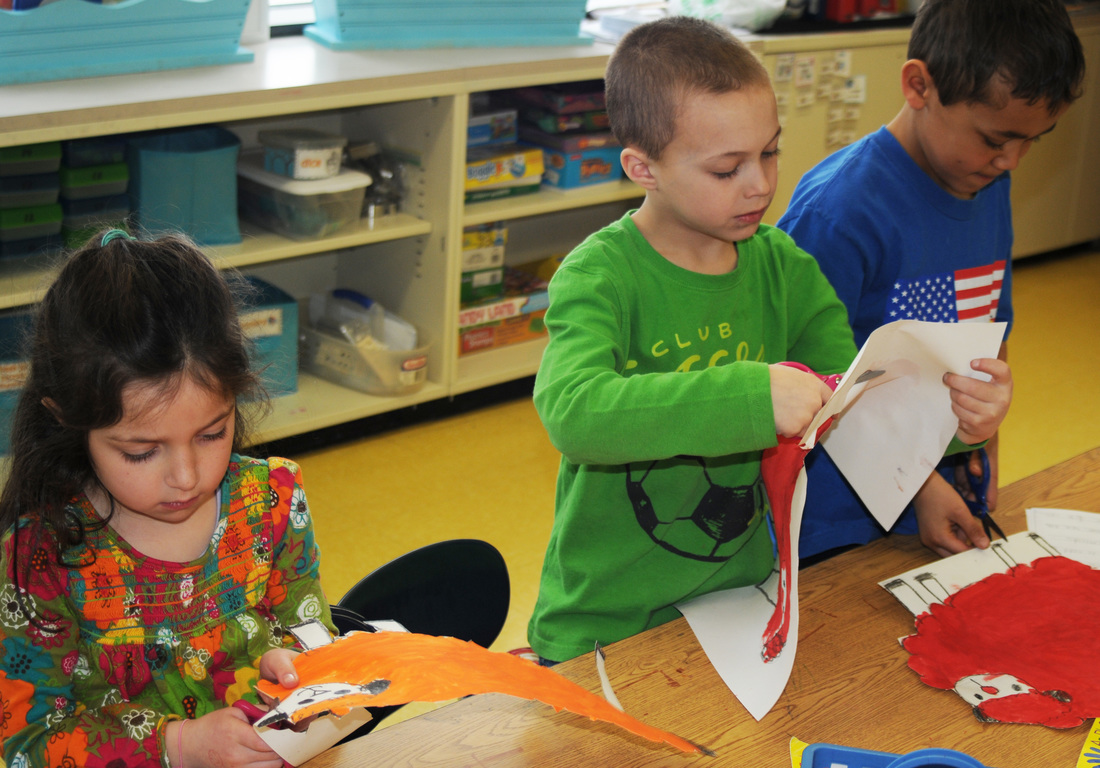 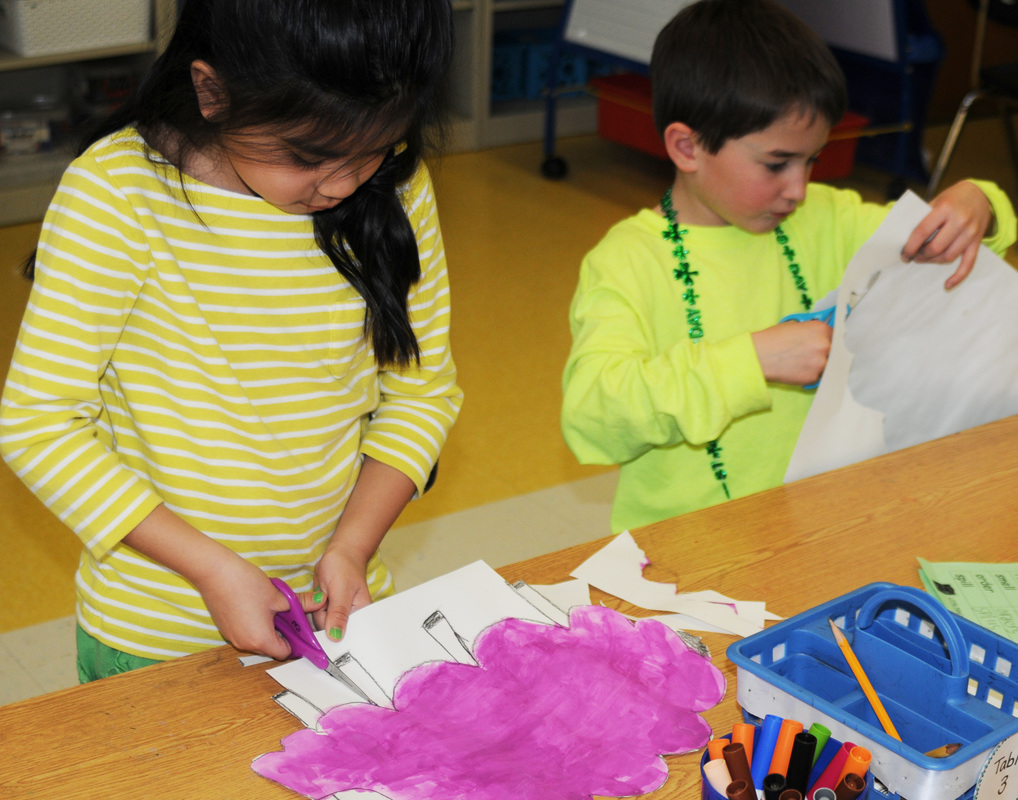 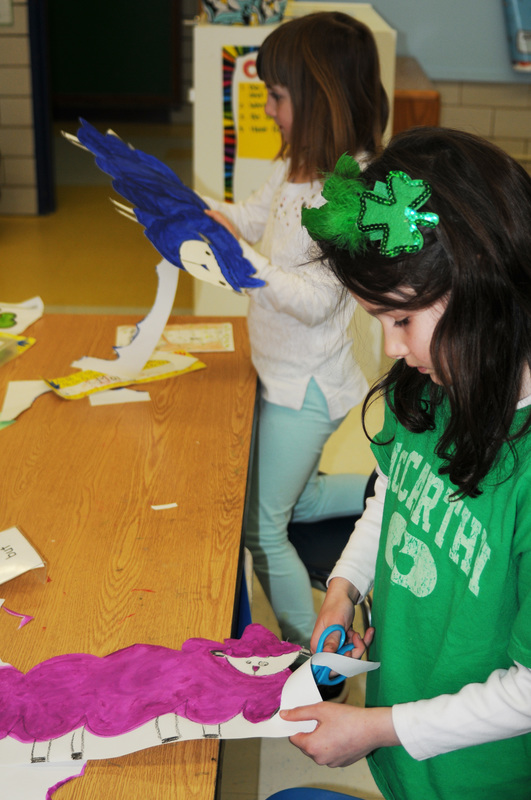 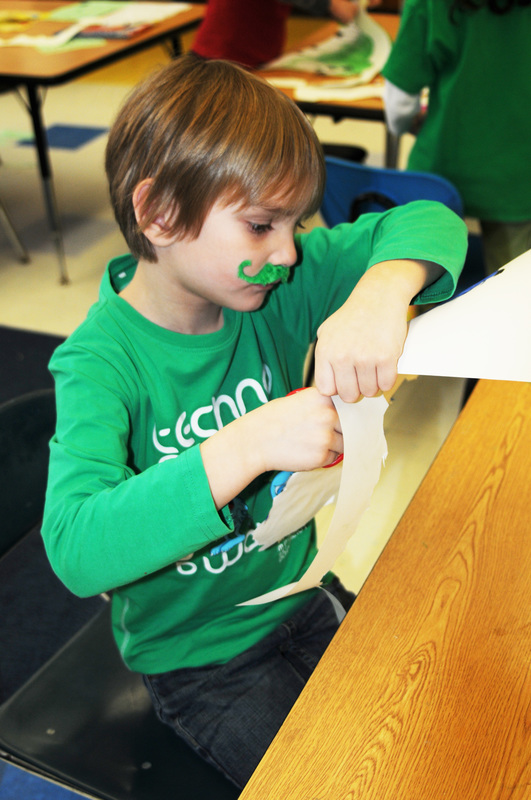 When all sheep had been cut out and mounted, it was time to make the curly-Qs! I honestly had no idea how successful the students would be at rolling the strips of paper around a pencil with their tiny hands, but they really surprised me! They absolutely loved making them, and had no trouble at all. The specific task was to make curly-Qs in the warm or cool colors that were not the color of the paint. For example, a red sheep would have yellow and orange curly-Qs. As each curly-Q was made, it was gently dipped in glue and pressed onto the sheep. 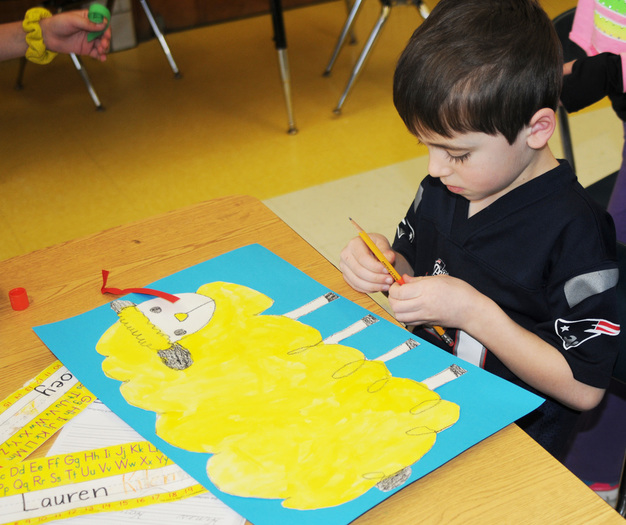 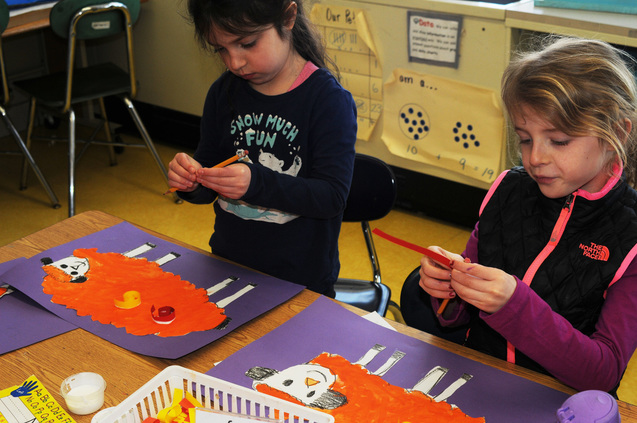 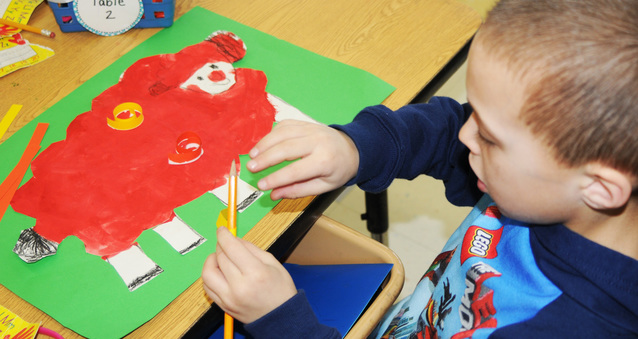 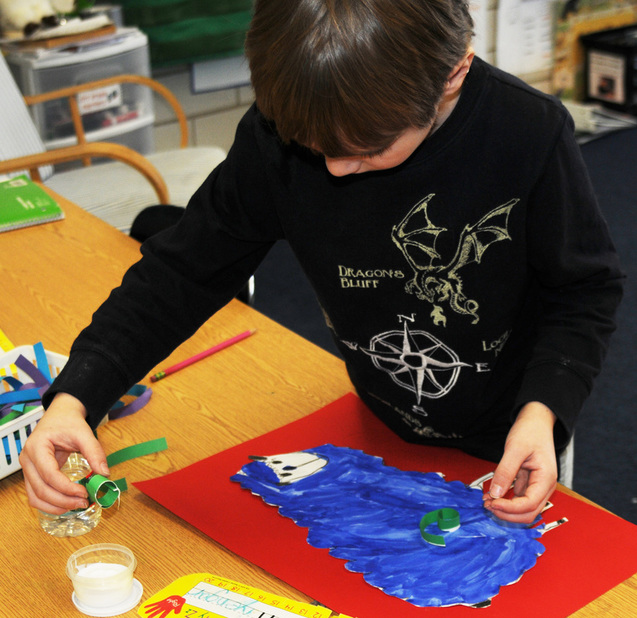 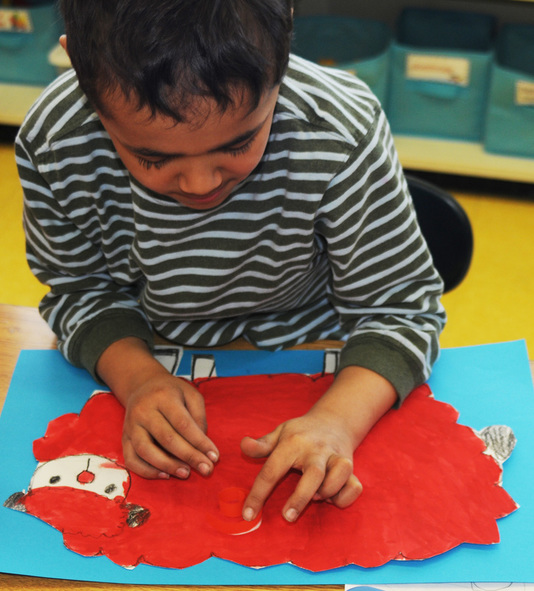 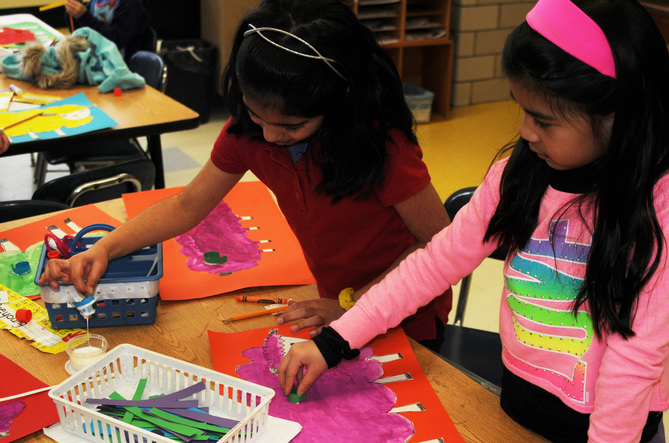  The final results were outstanding! I couldn't resist displaying each and every one of them on the bulletin board outside of the art room. The display has only been up for a couple days, and I have gotten countless compliments. Fantastic sheep, first grade! 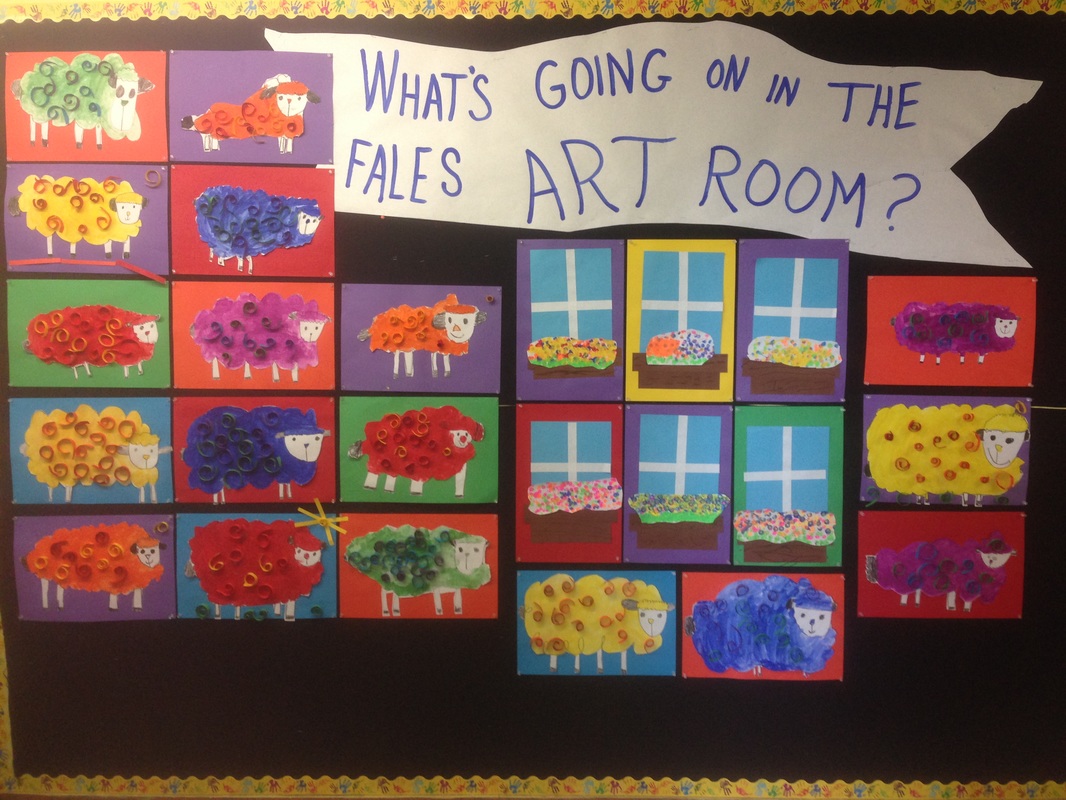 Click photos to enlarge.
0 Comments
Although the last first grade blog had a Thanksgiving theme, and we are now quickly approaching Valentine's Day, first graders have been very busy with their art lessons! Students spent the weeks in between Thanksgiving and December vacation working with clay. First graders did a beautiful job making their clay snowmen, and you can read all about it here, on the "all grades" page. Since returning back to school at the beginning of the month, first grade students have been working very hard on making a snow person collage. I began the lesson by reading the story "Snow Happy to be Here," by Cheryl Hawkinson. 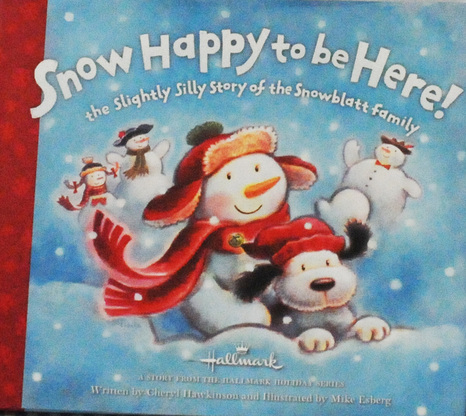
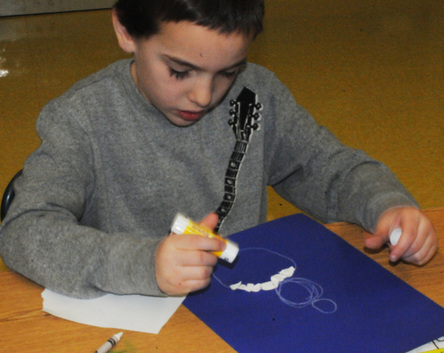
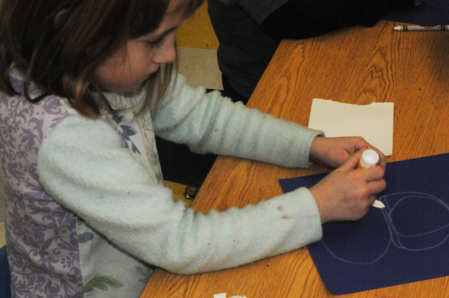
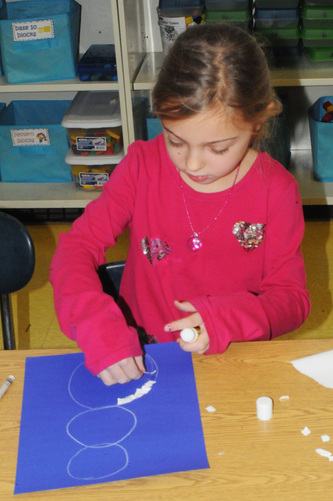
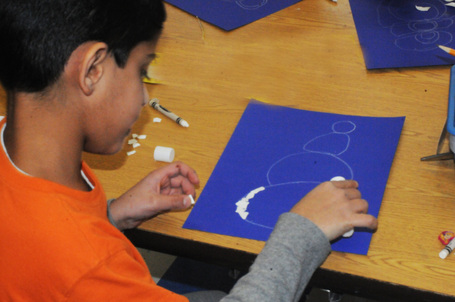
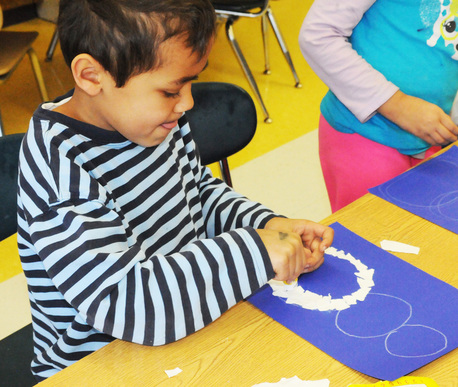
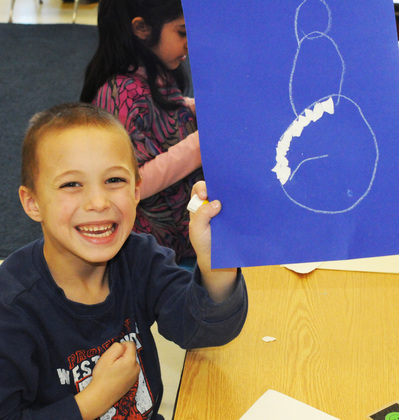
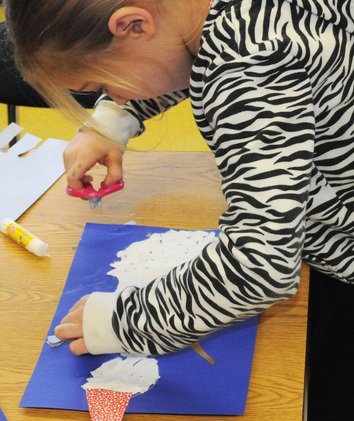
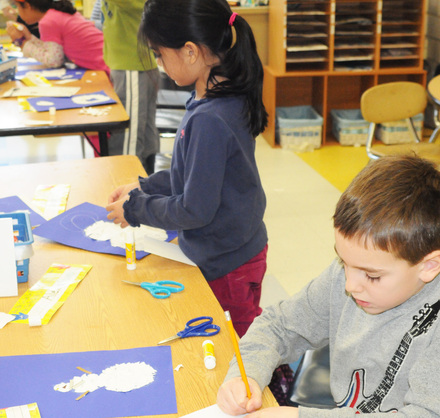
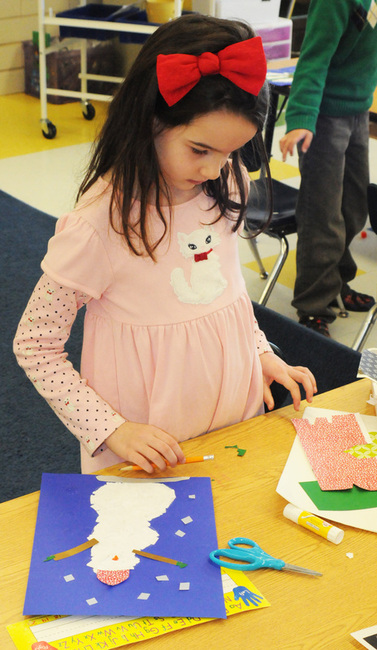
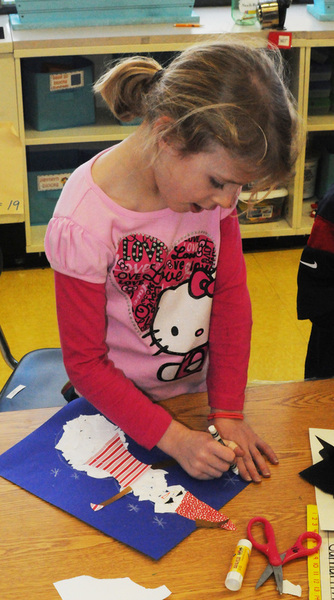
The story is about the Snowblatt family, and describes how humans make snow people from snowflakes, and reveals the magical thing that they do to make the snow people come to life. The story also focuses on the fact that just like snowflakes, no two snow people, and no two humans, are exactly alike. We are all unique, and that's what makes us special. So the students' task was to tear up little bits of paper to make snowflakes, and then collage them to make their own unique snow person. They began by using a white crayon to draw the outline of a snow person on a blue piece of paper. Once that was done, they started making and gluing their snowflakes. We talked about the importance of overlapping the snowflakes as they glued. 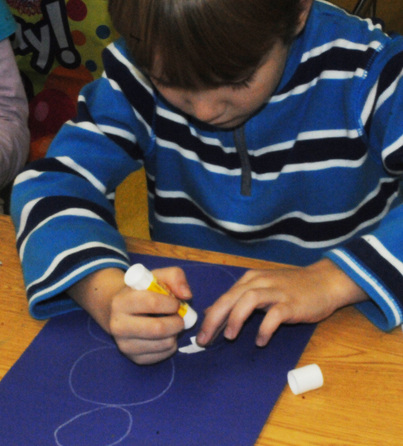
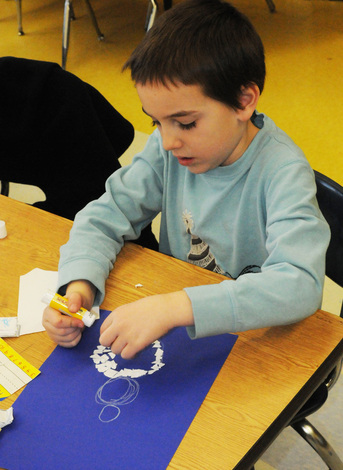
Once the bodies of the snow people had been created, the real fun began! Students used fancy papers (donated by Checkerboard Paper in West Boylston) to personalize them. I was so impressed with the creativity and imagination that went into these! Everyone really took their time and thought about how they would make their snow person completely unique. 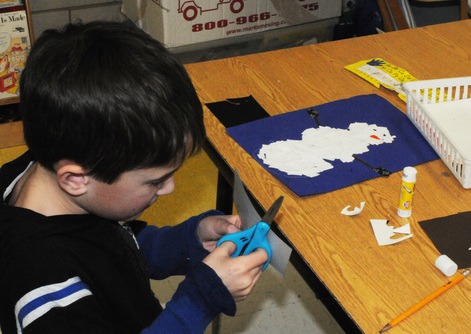
This project was a great success, and with a blizzard raging outside at this very moment, I have a feeling that a lot of little humans will be making real snow people in the next few days! I wonder if any of them will look like these:  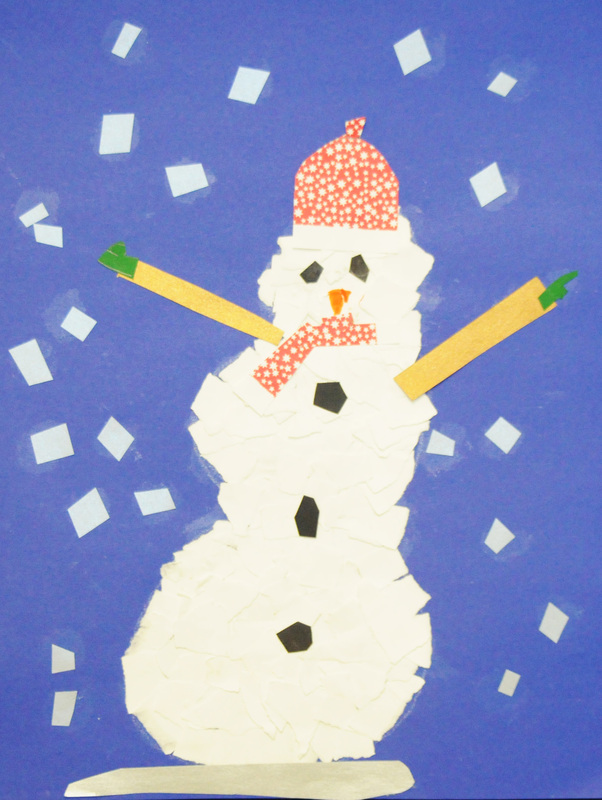 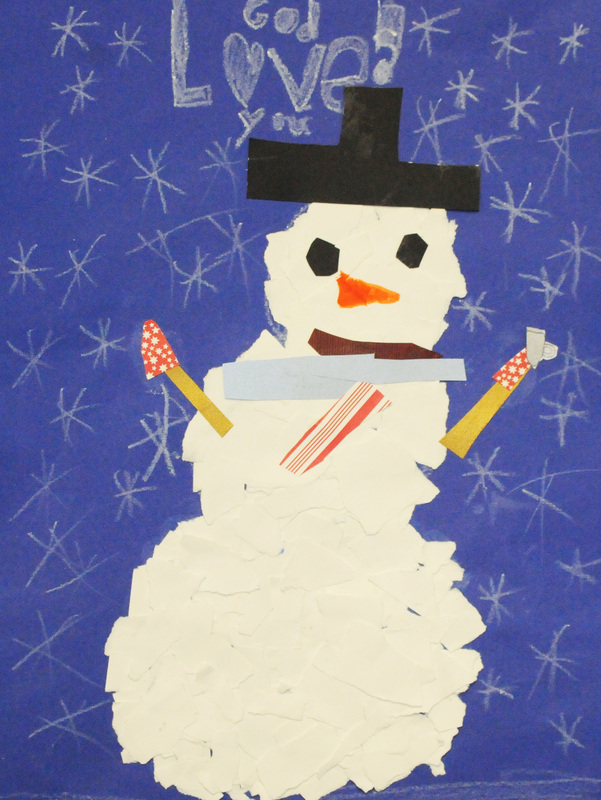 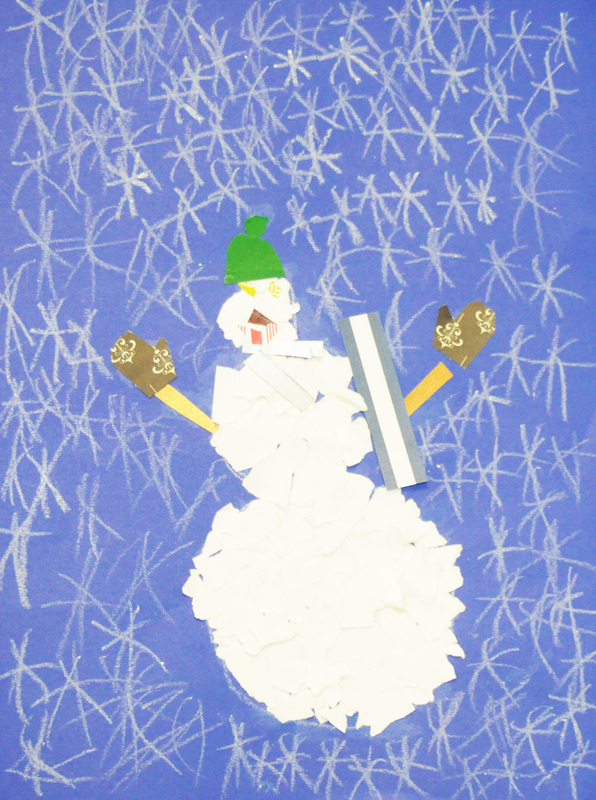 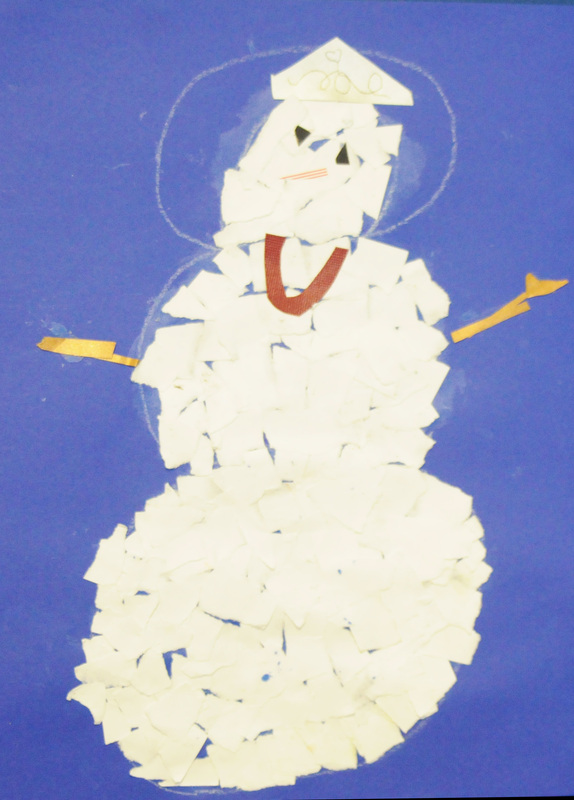  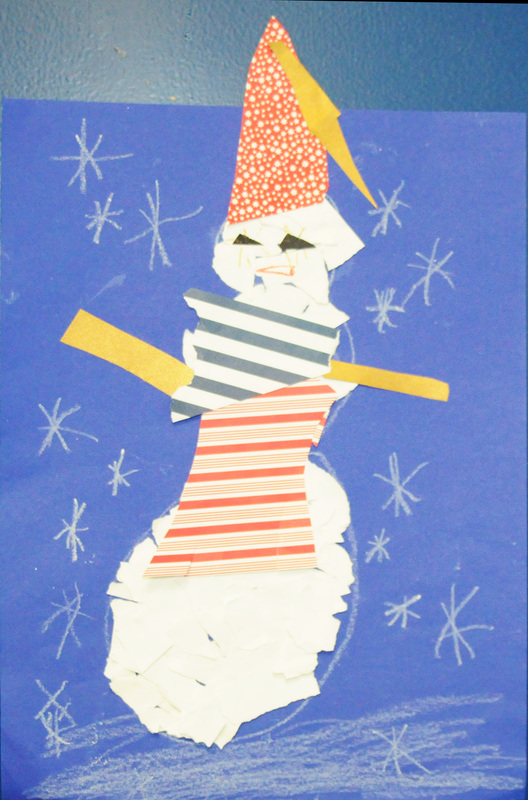 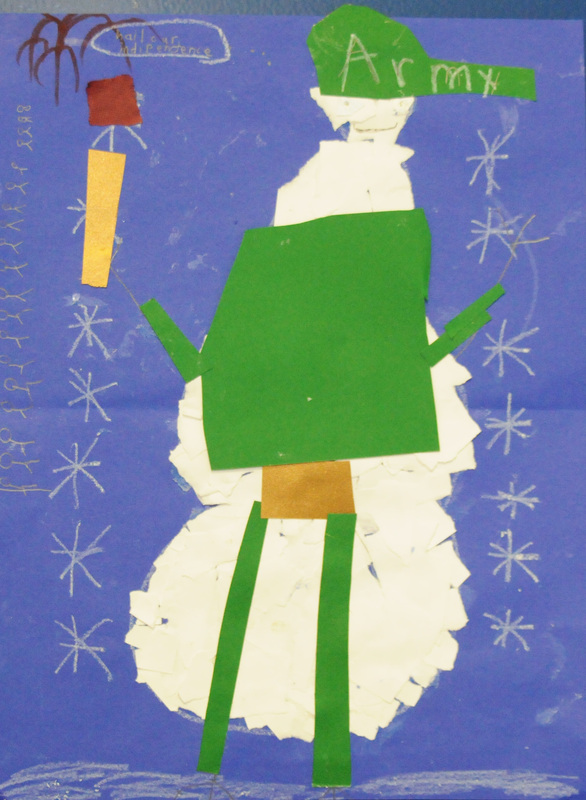 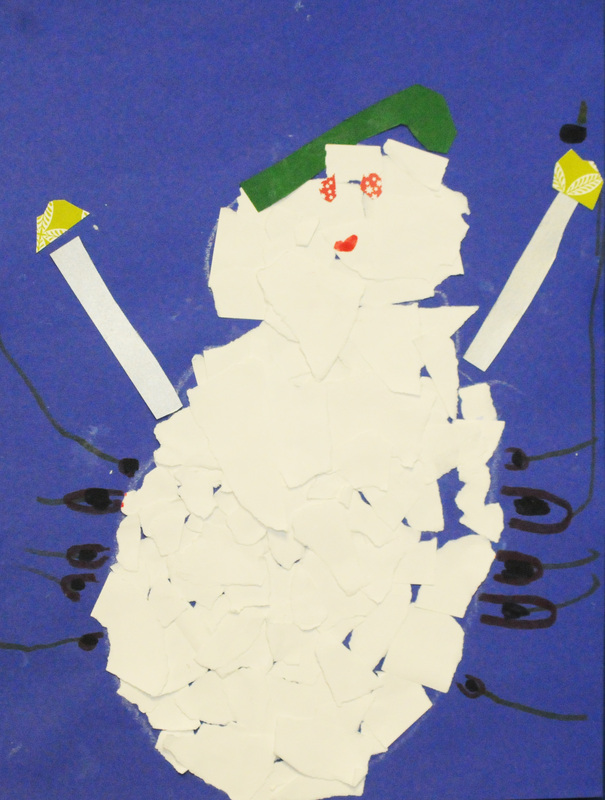 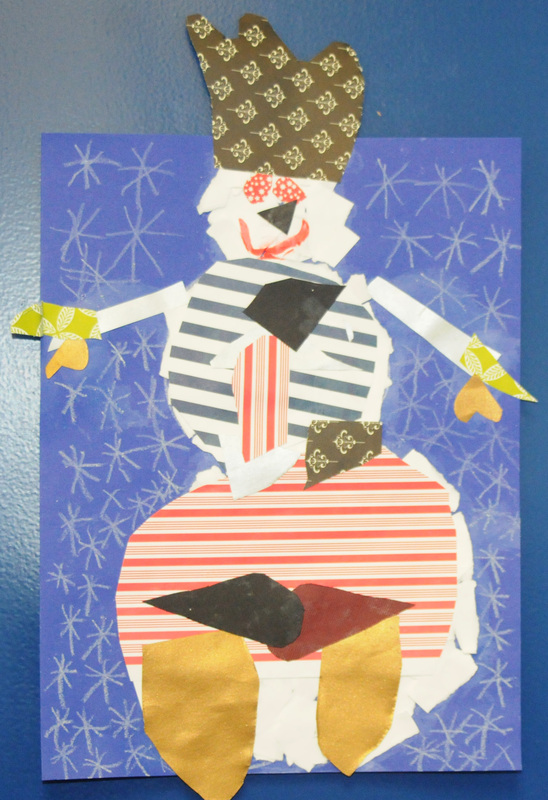  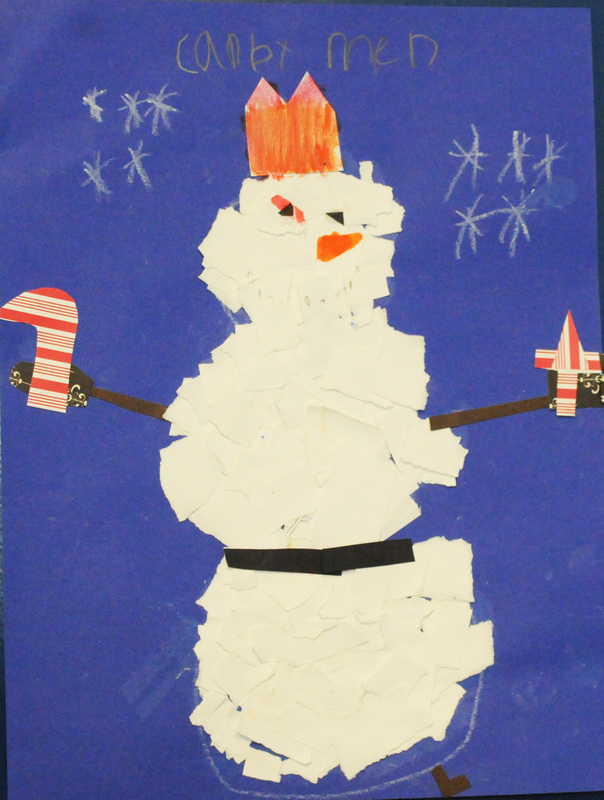 Super job, first grade! Keep up the fantastic work!!
Students in first grade have been learning about color for the past couple of weeks. We took a look at the color wheel and talked about primary and secondary colors. What are the primary colors? Why are they important? What are the secondary colors? How are they made? After answering these questions, students were introduced to their next project: color wheel turkeys. Students were given sheets of construction paper (4 x 10" rectangles), one of each primary color and one of each secondary color. With a black crayon, they traced around a feather shaped template on each piece of colored paper and then cut their feathers out.  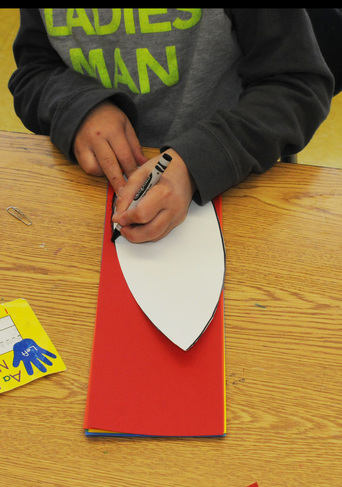 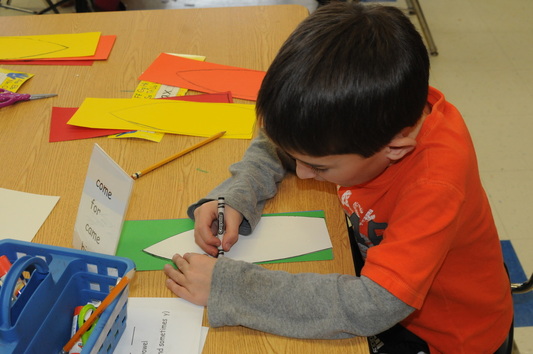 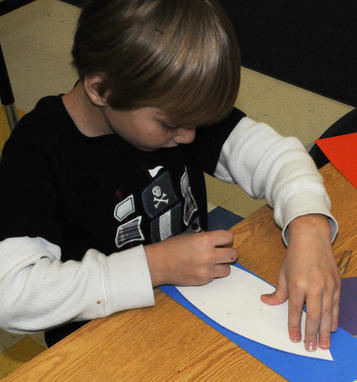 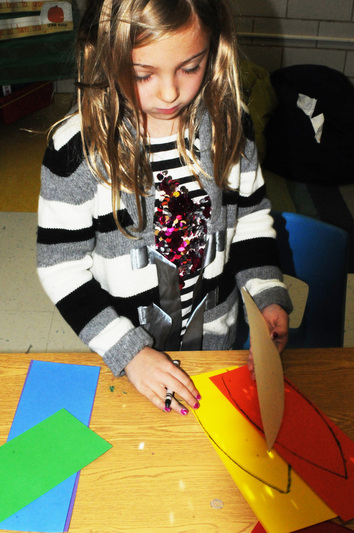 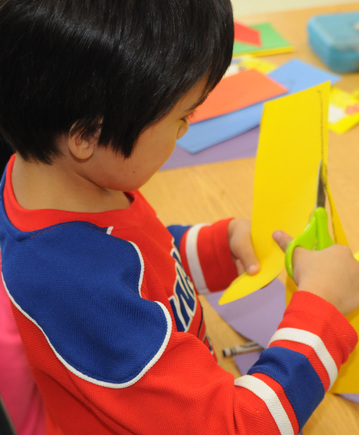 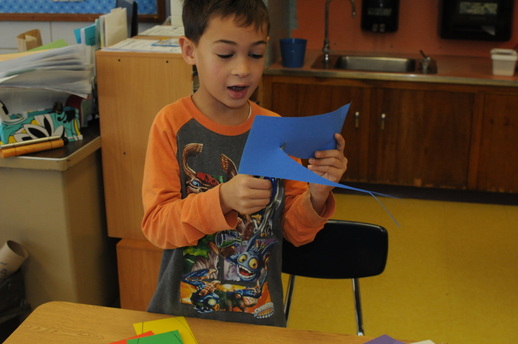 Then they did the same thing with two circle shapes - one small and one large. 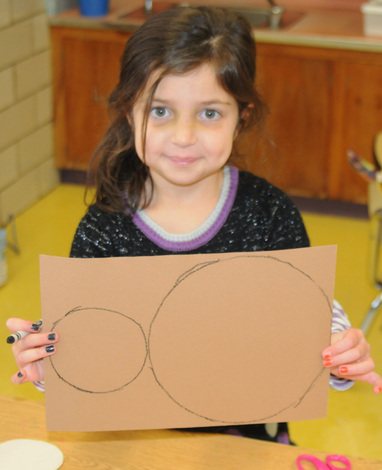 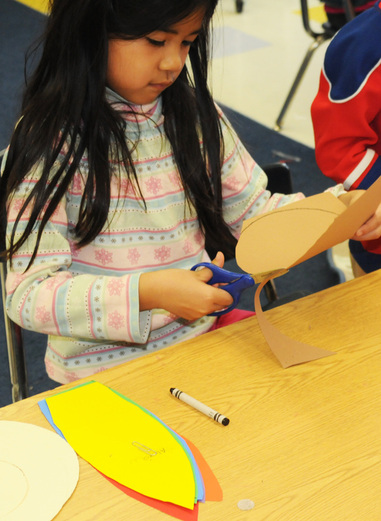 The following week, it was time to put the color wheel turkeys together! We first reviewed the color wheel with this handy-dandy color wheel that I made out of foam board. Each color piece is removable, so I took them all off, and the students put them back where they belong after answering questions (What is one primary color? What color do we get from mixing red and blue?). They loved it! 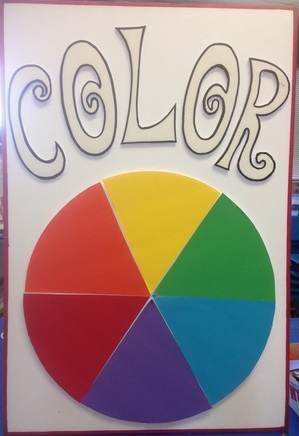 Once I was sure that each and every student had the primary and secondary colors down pat, it was time to start assembling. Students began by gluing the small circle to the top of the big circle, and then they glued the primary color feathers on in the correct order. 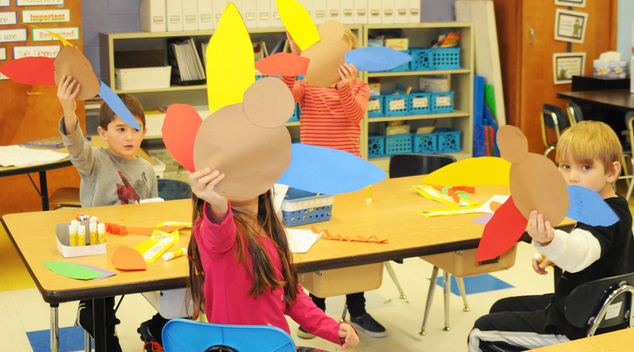 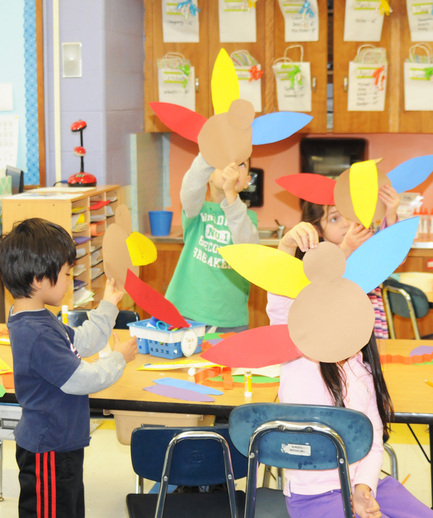 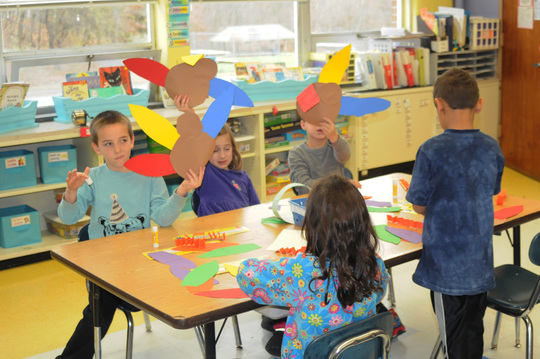 When the primary colors were all glued in place, the secondary colors were added where they belong. 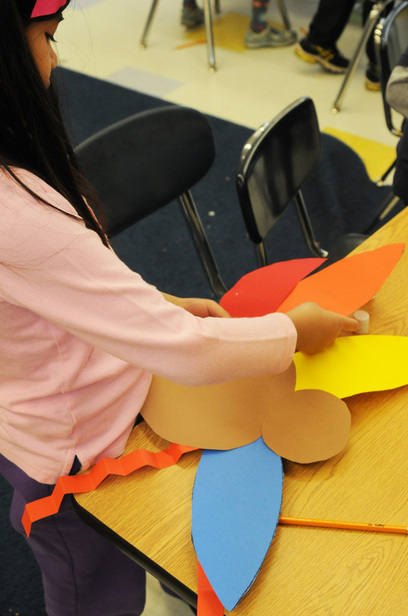 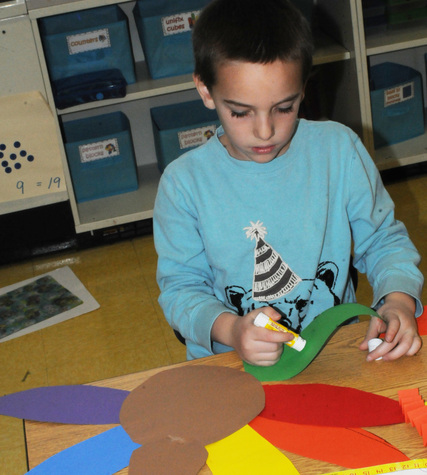 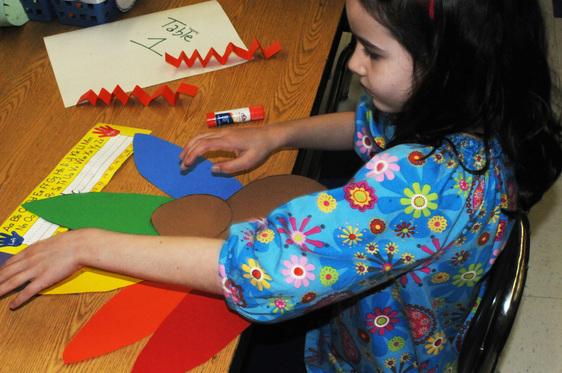 The last steps were to fold orange strips of construction paper accordion style and glue them on for legs, add googly eyes, and draw on a beak and a wattle. 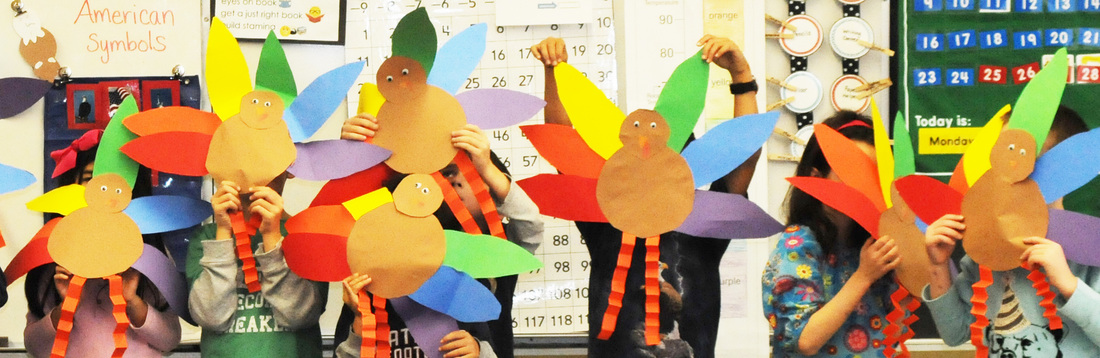 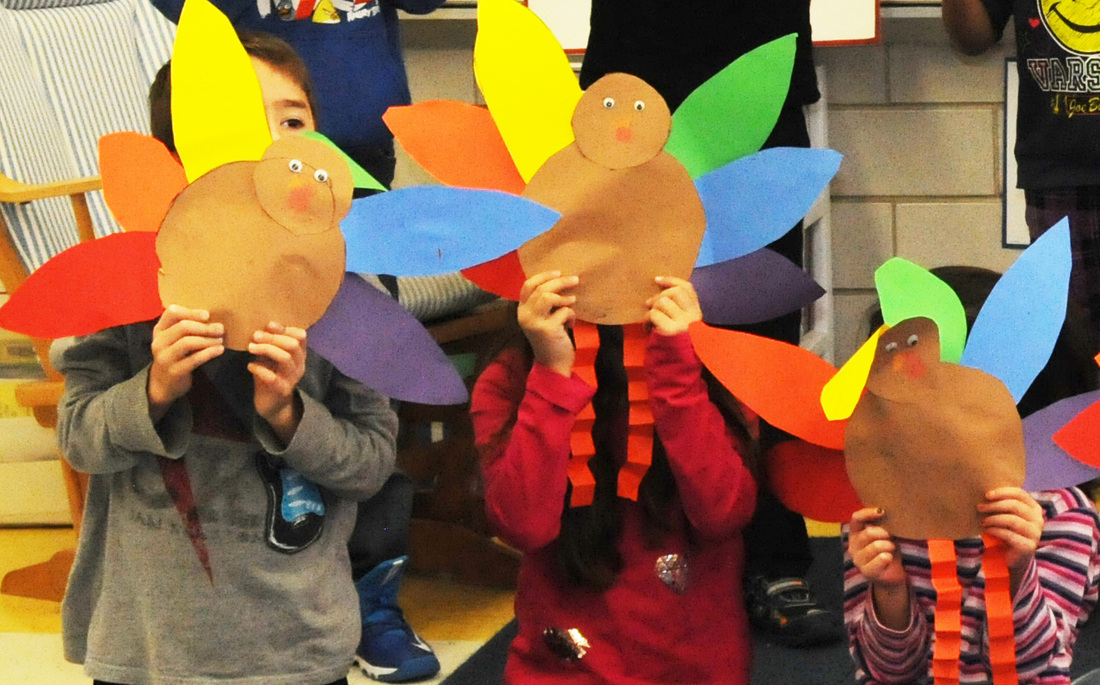 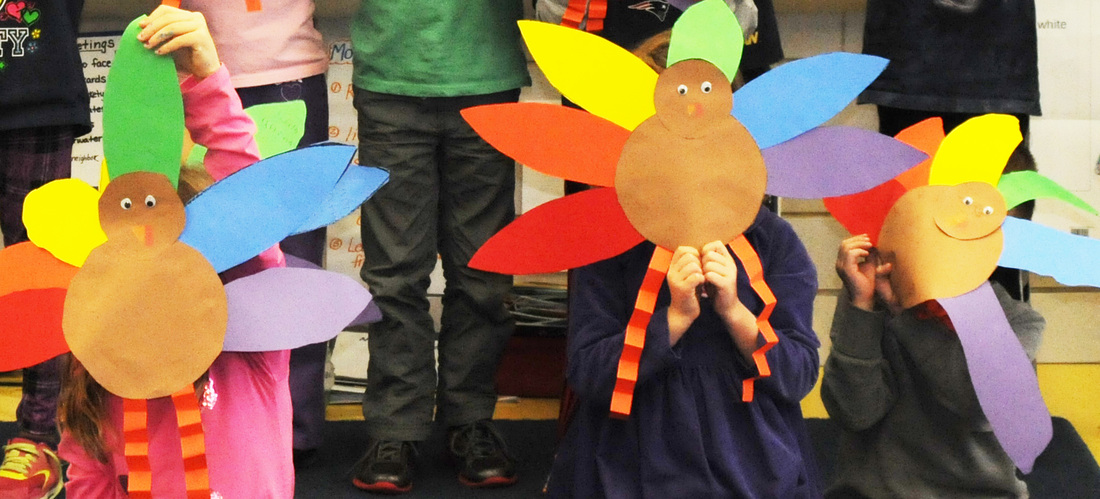 Excellent work, first grade! Gobble gobble!
First graders have been very busy for the past few weeks creating art by looking at fall leaves. The leaves have been so beautiful this year! The colors are so vibrant and inspiring. I began the lesson by asking the students what they would do if they had a relative who lived far away and had never seen a fall leaf. Their reply was as expected: take a picture and email or text it. I said of course! Then I asked them to pretend they were alive 150 years ago, before cameras and cell phones. How would they show their relatives the beautiful fall leaves then? After thinking about it for a few minutes, they came up with the answer: they would have to draw it and send the drawing in the mail. Ah-ha! On the first day of our leaf study, students were each given a leaf to look at and draw with a pencil. I purposely didn't give them too much direction because I wanted to see what they could do on their own. I told them to take some time and really observe their leaves while they were drawing. 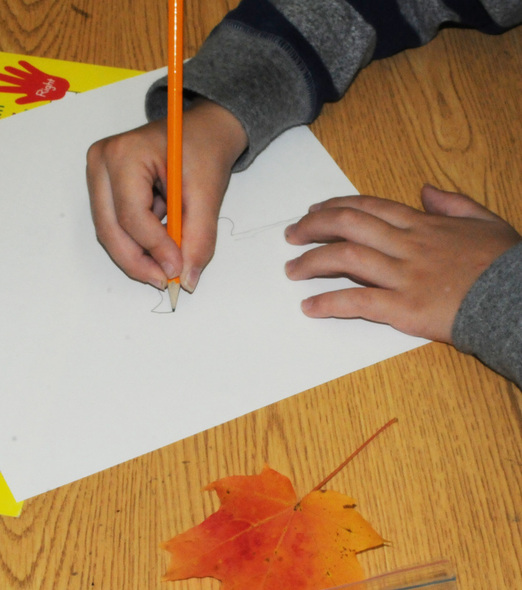 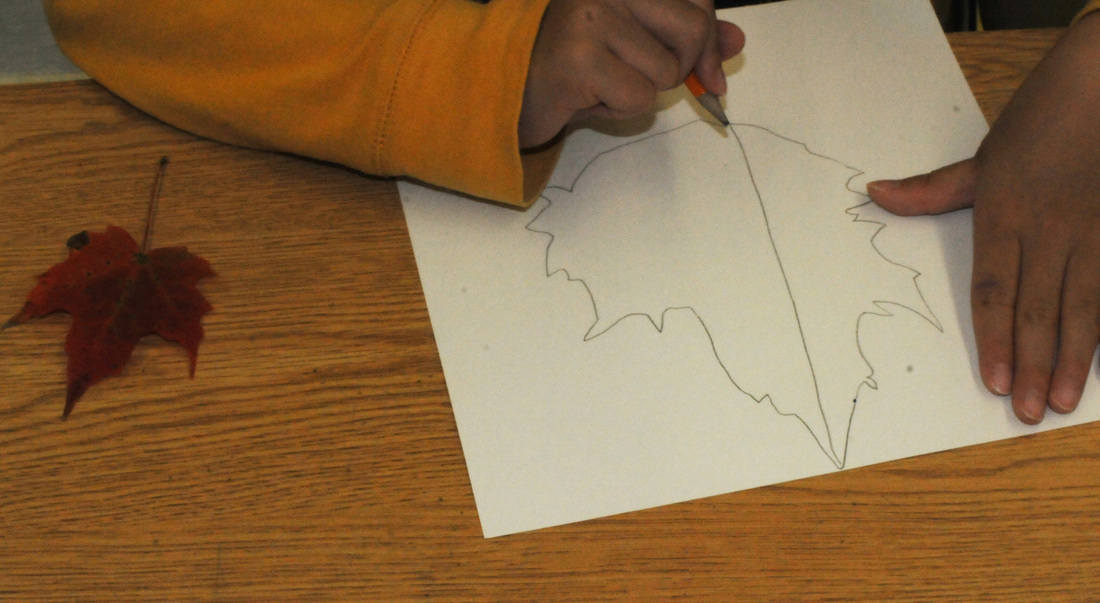 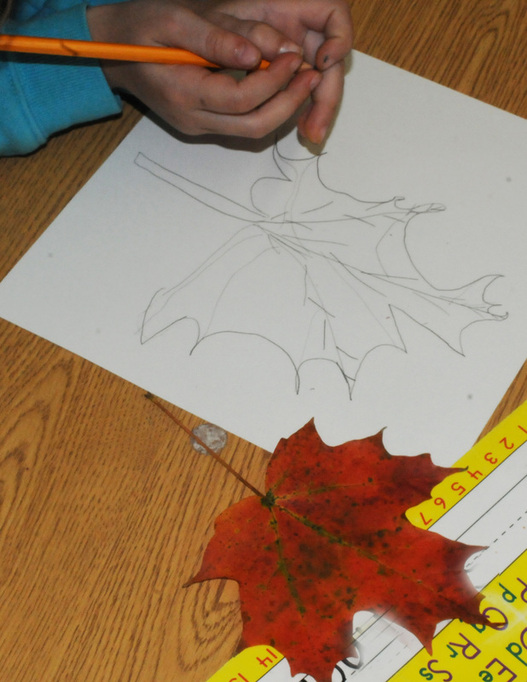 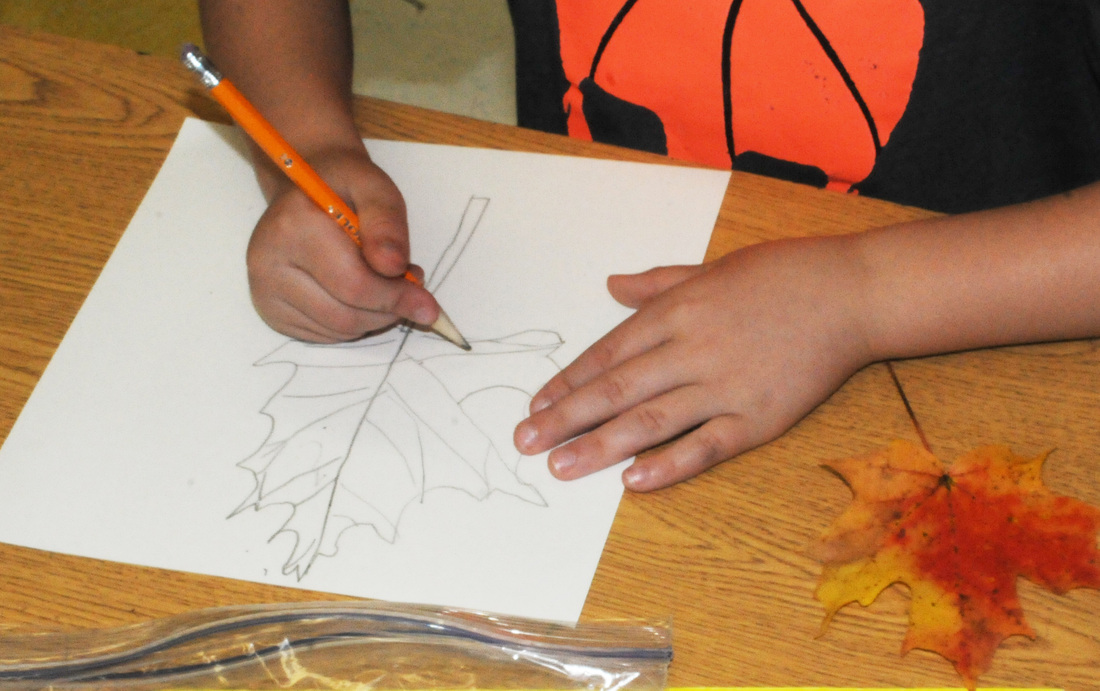 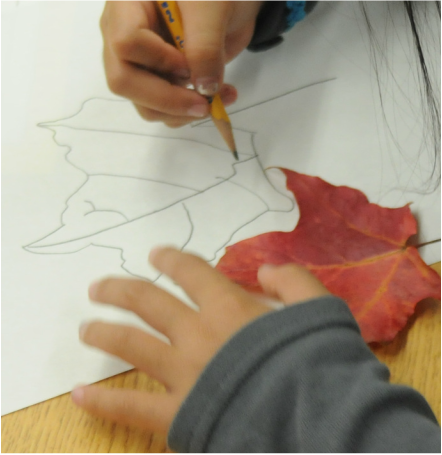 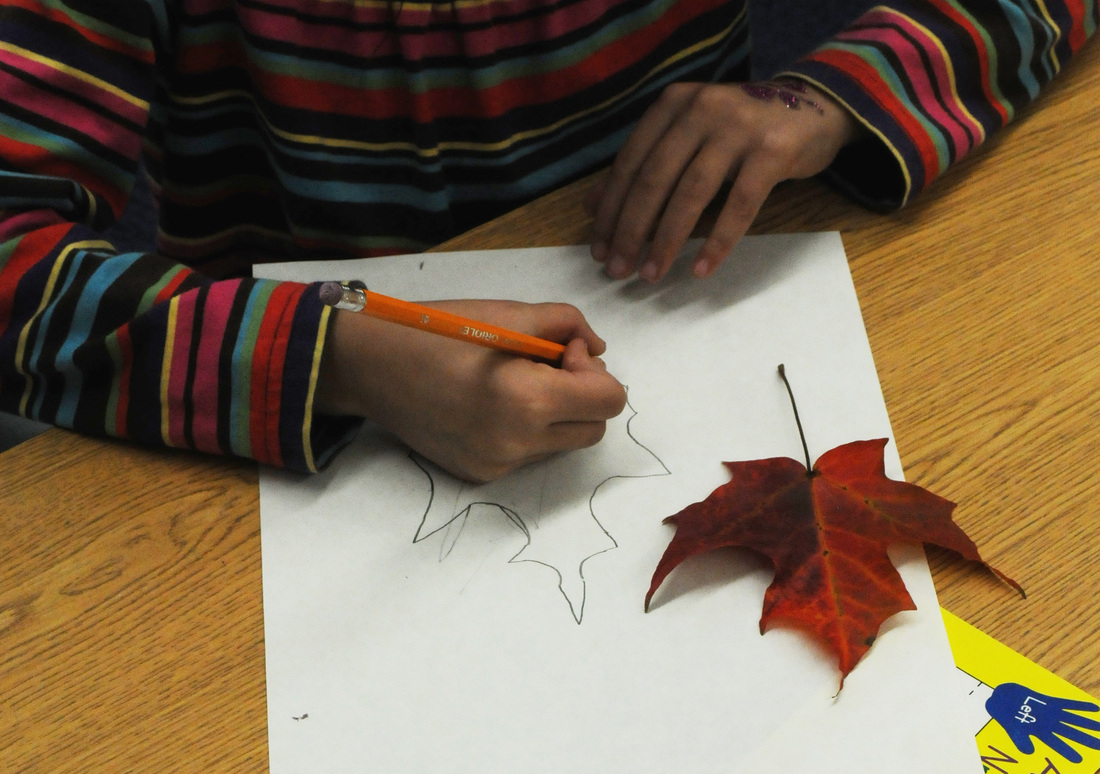 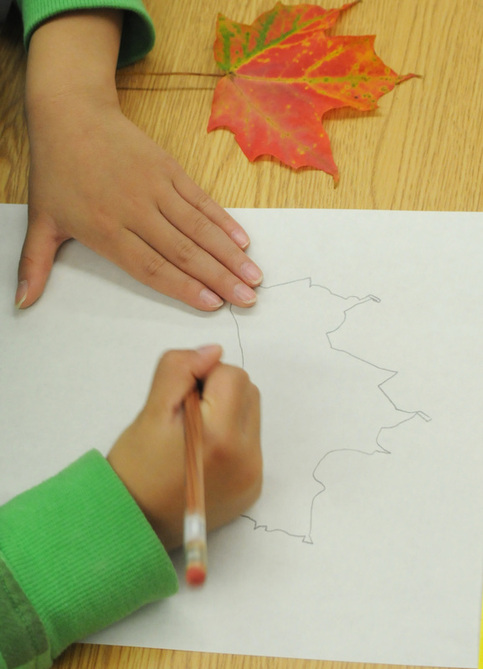 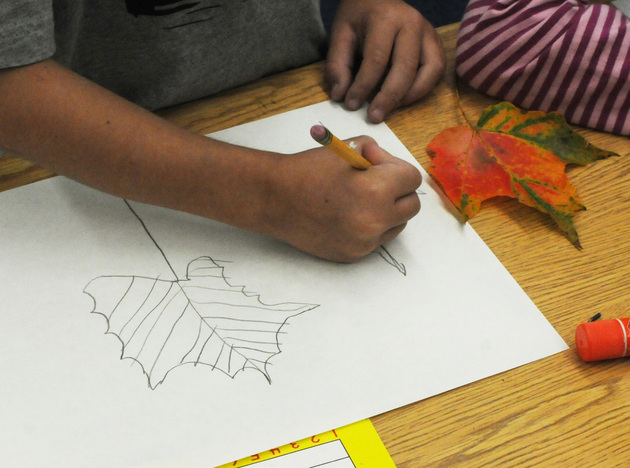 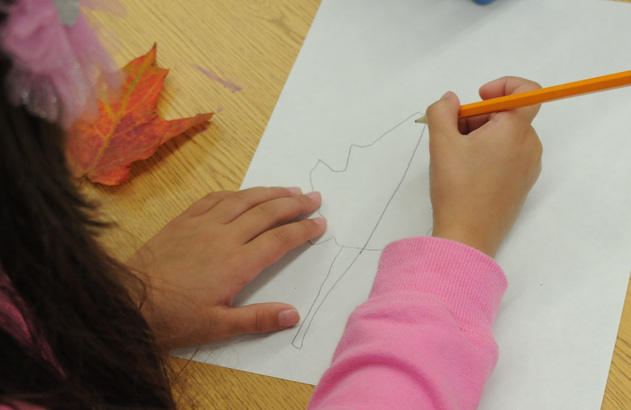 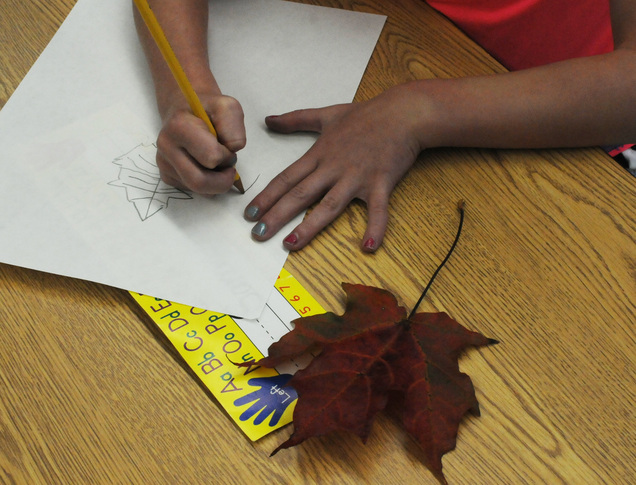 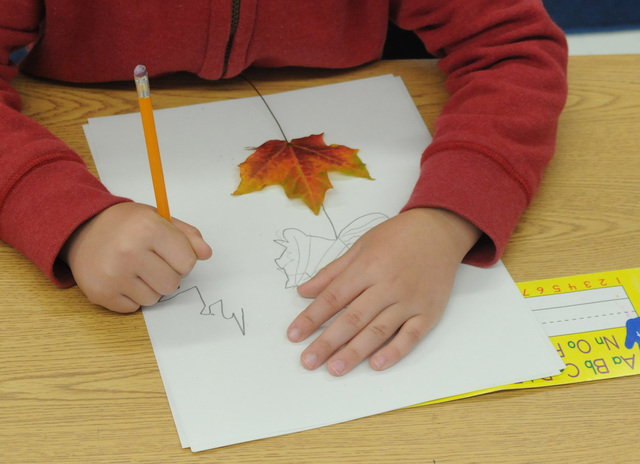 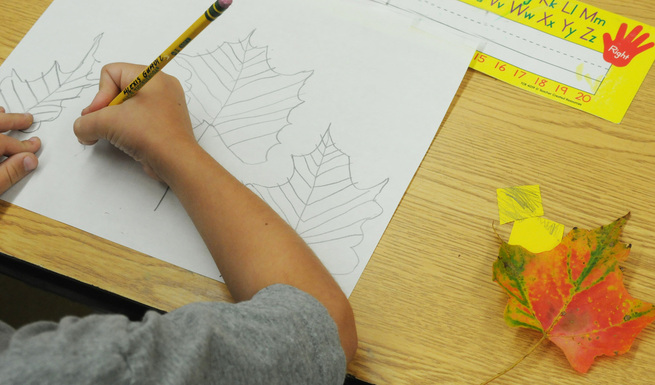 Once students finished their pencil drawings, they closely observed the colors in their leaves and used crayons to color them in. Look how beautiful! 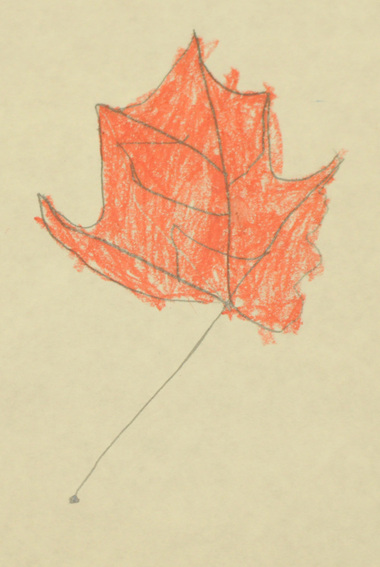 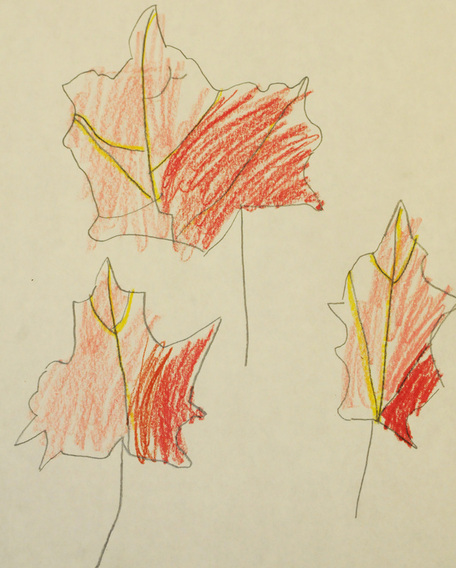 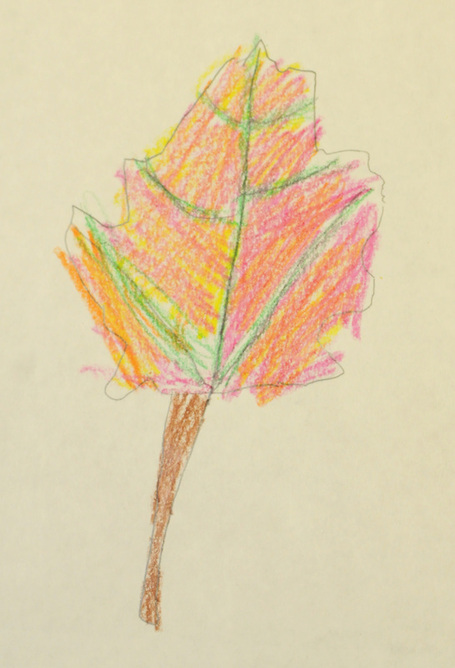 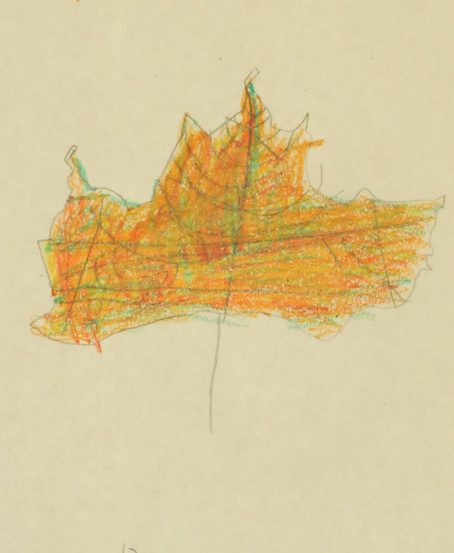 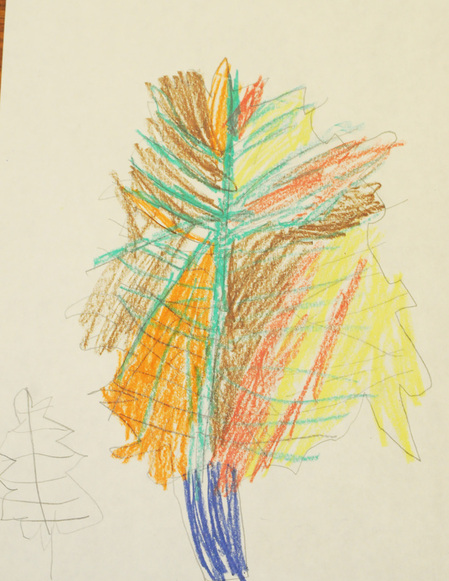 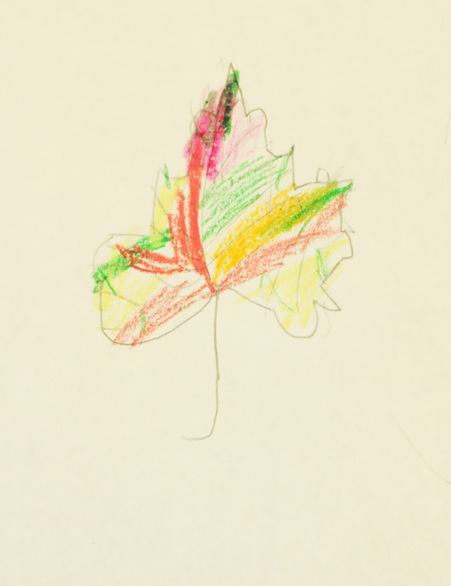 The following week, I gave the students a more guided lesson on observational contour drawing. We talked about the veins of the leaves and their important job. I told them to really take their time and observe, reminding them that "Slow and steady wins the race!" Several different leaves were placed on each table, and students were given thin Sharpie pens to work with (no erasing!). 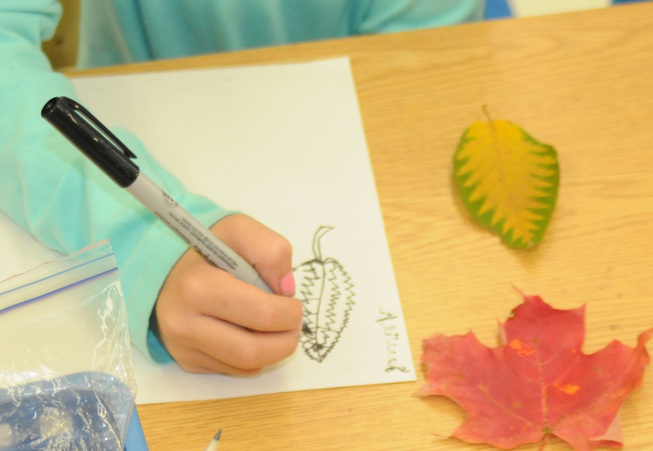 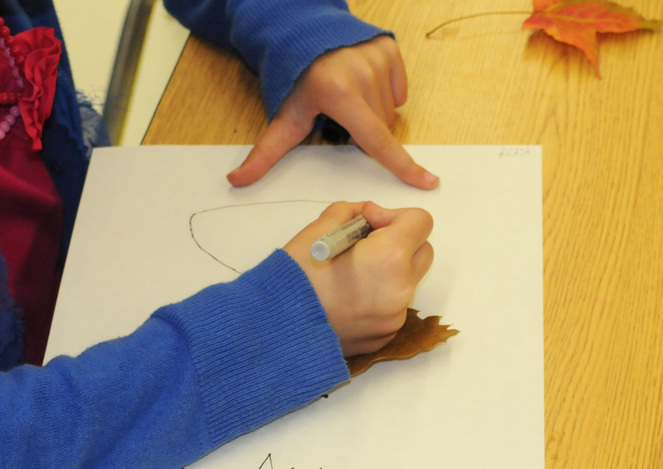 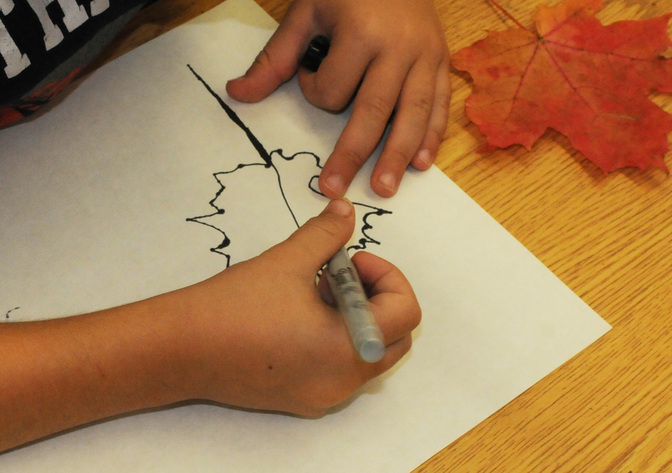 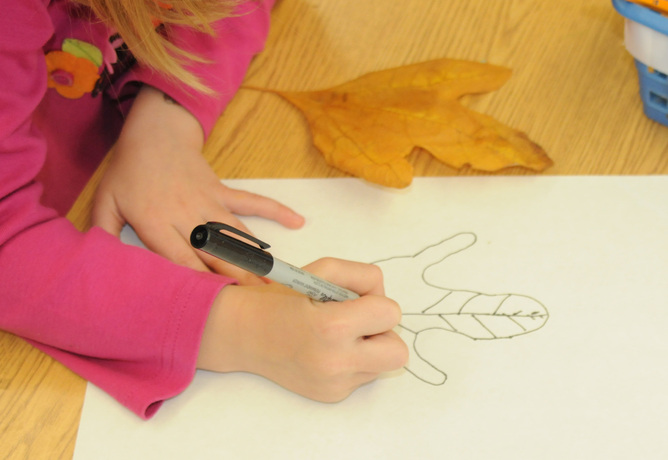 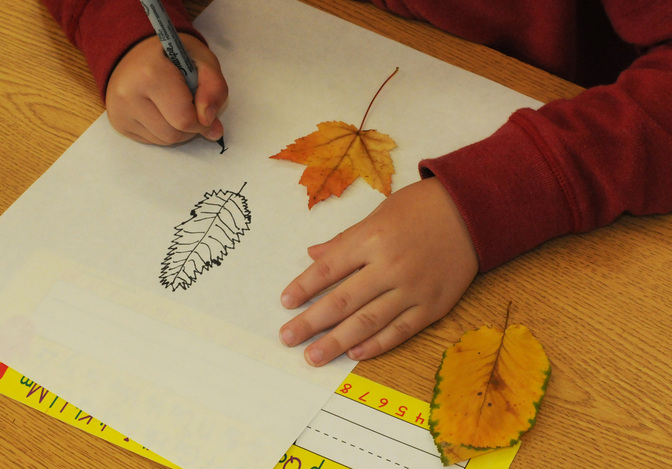 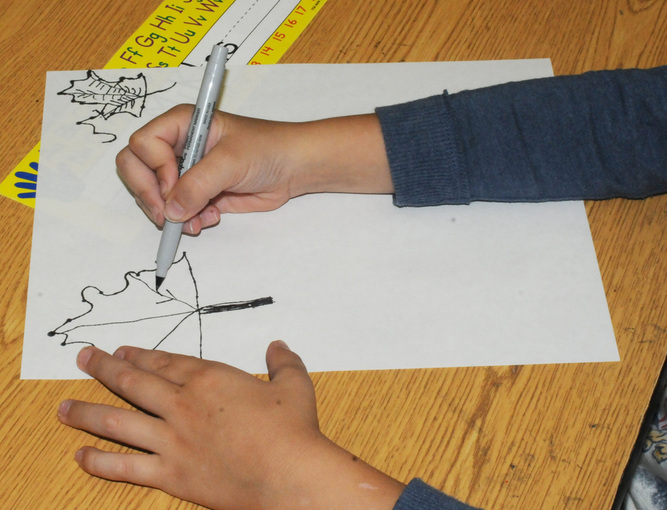 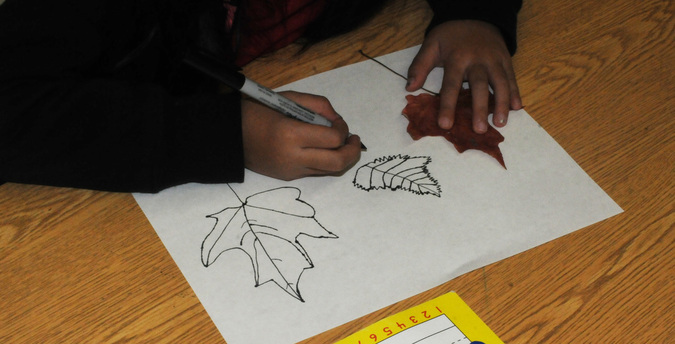 I encouraged students to draw more than one leaf, and more than one type of leaf. The results were amazing! 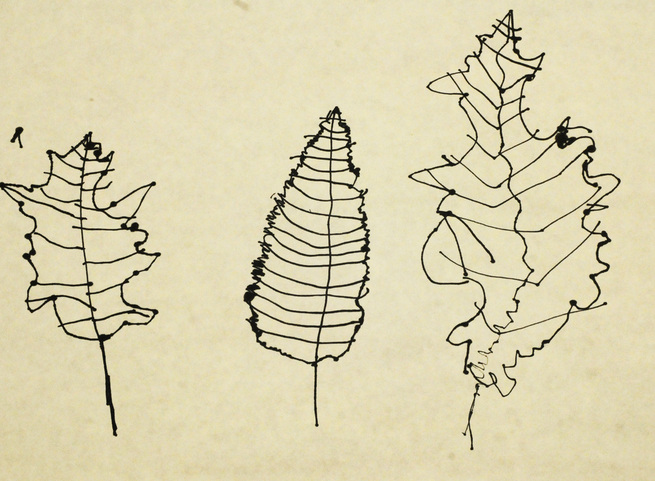 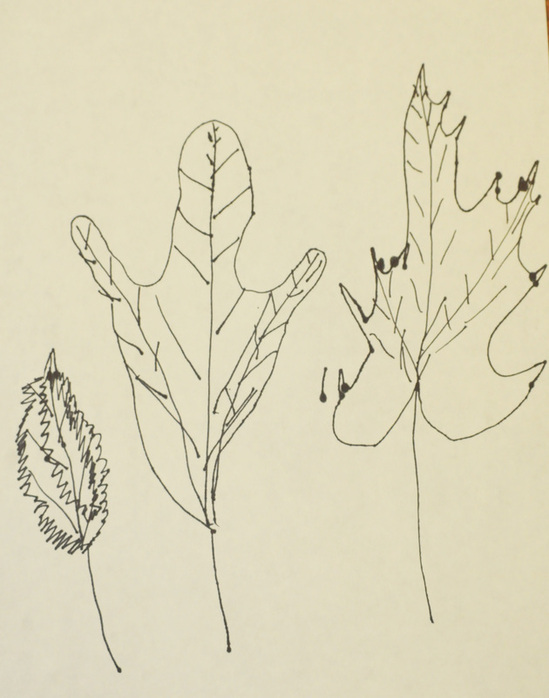 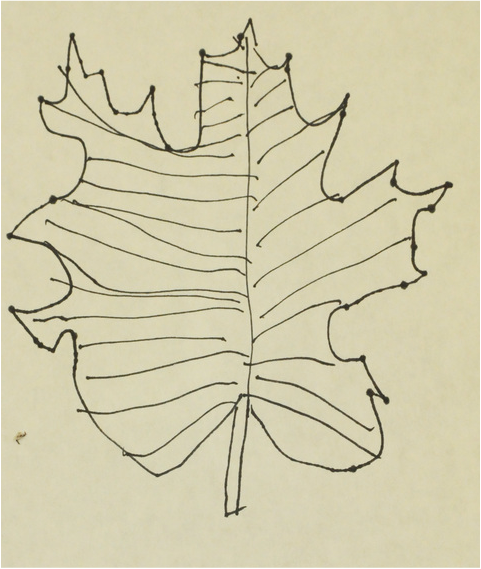 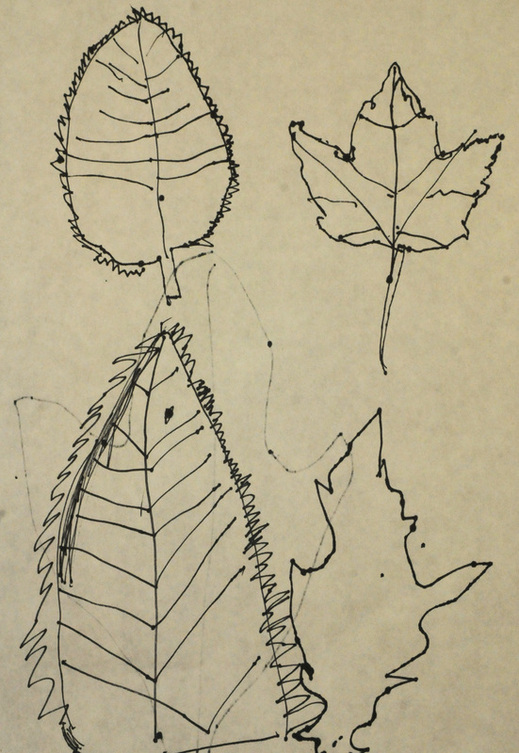 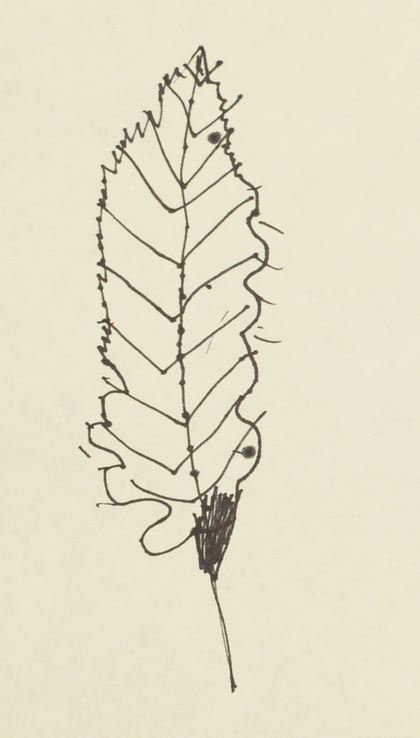 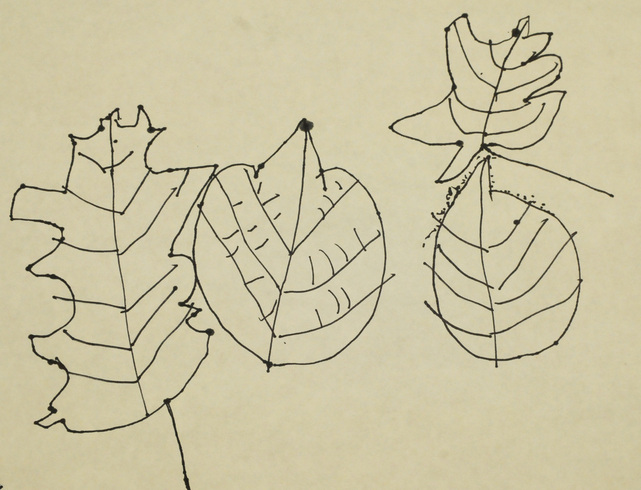 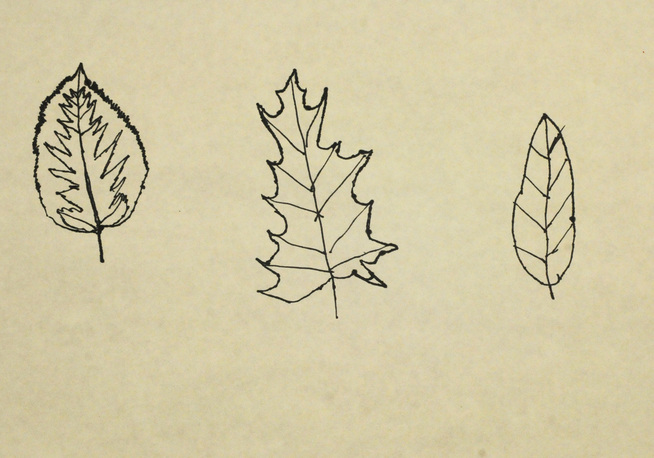  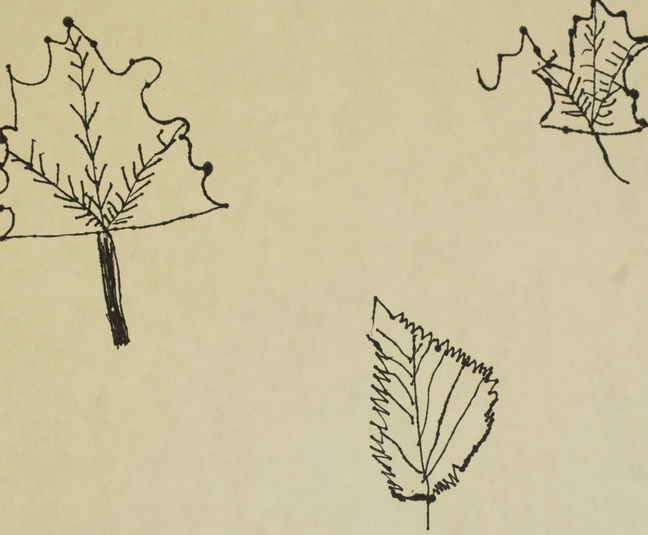 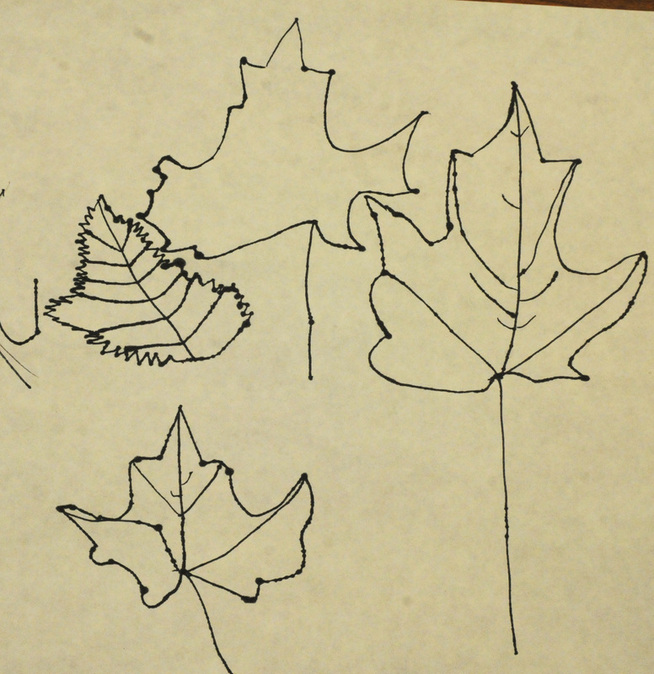 The students really enjoyed the final phase of our leaf study. As they did for the first lesson, students first observed a leaf and drew it in pencil. Next, they went over the pencil lines with wax crayon. After that, they observed the colors in the leaves and colored them in using watercolor crayons. Lastly, they dipped a paintbrush in a little water, and watched magic happen as the crayon colors blended and turned into paint. 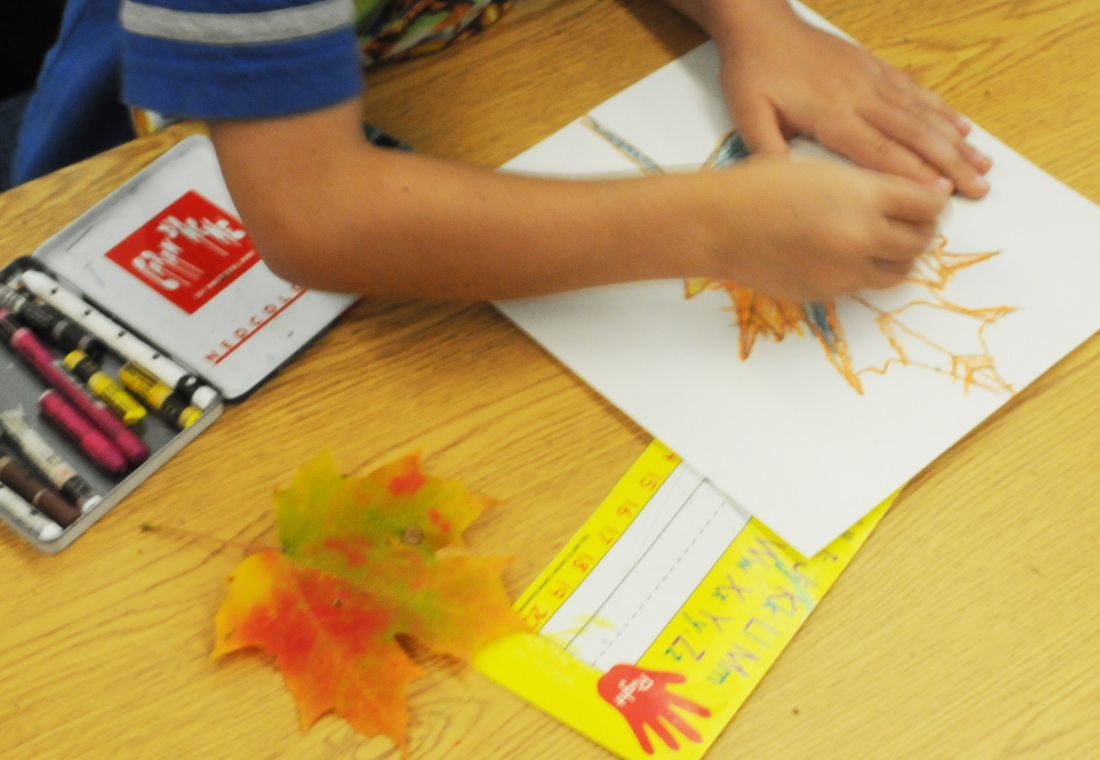 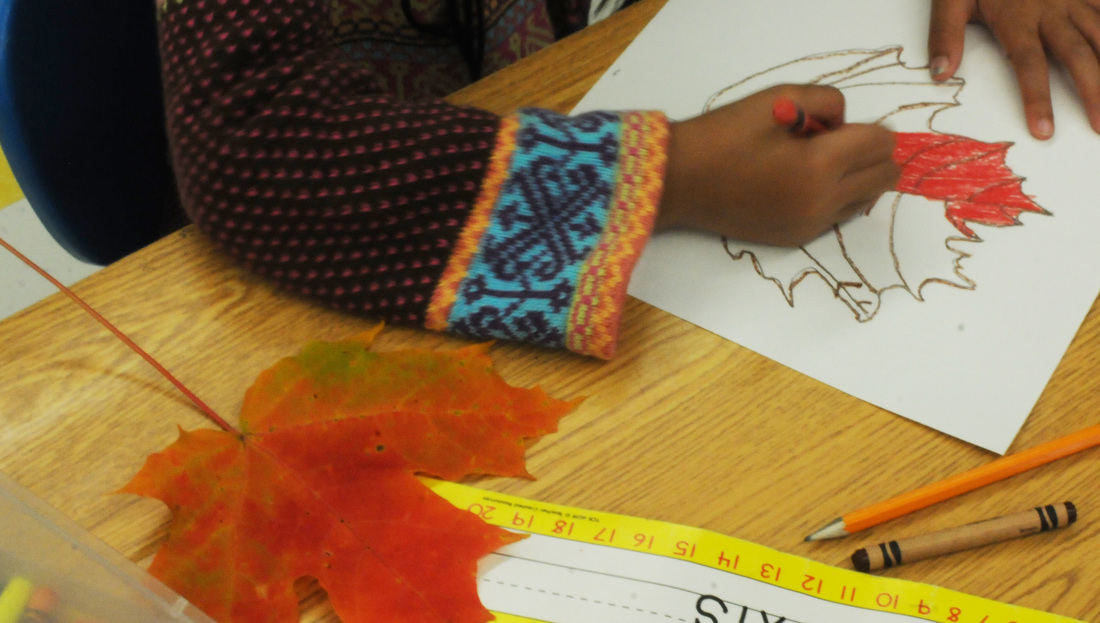 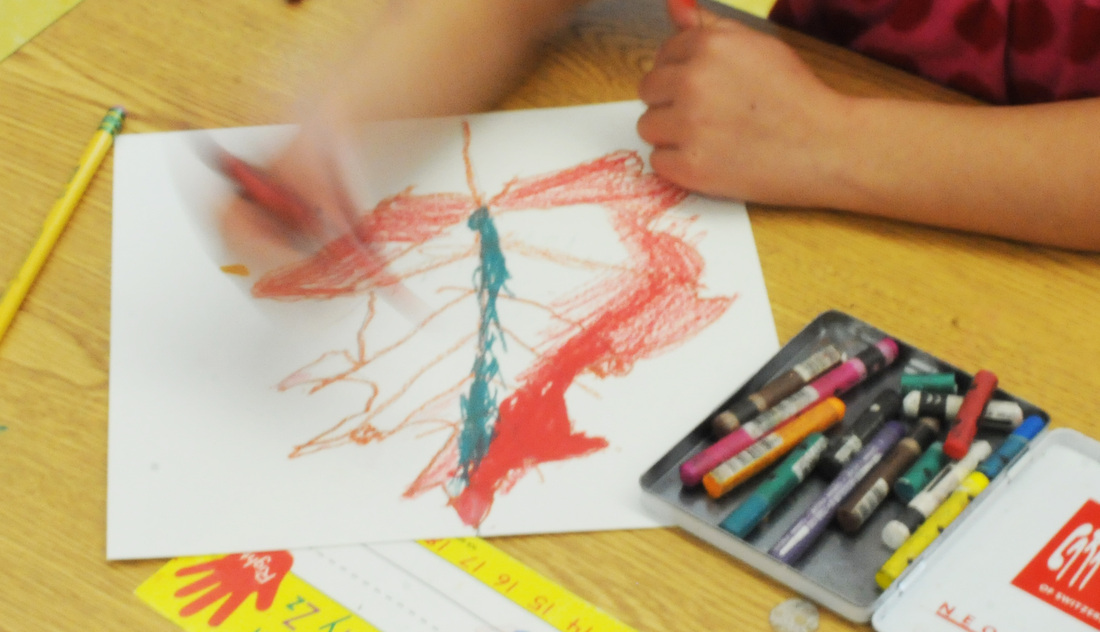 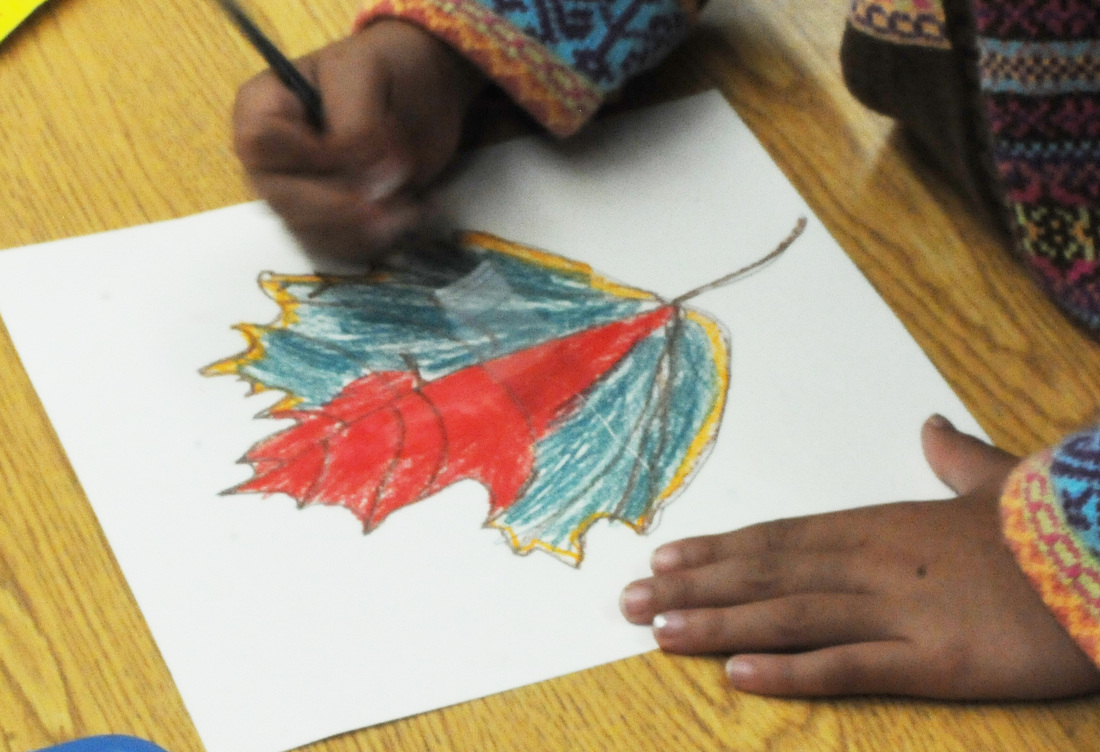 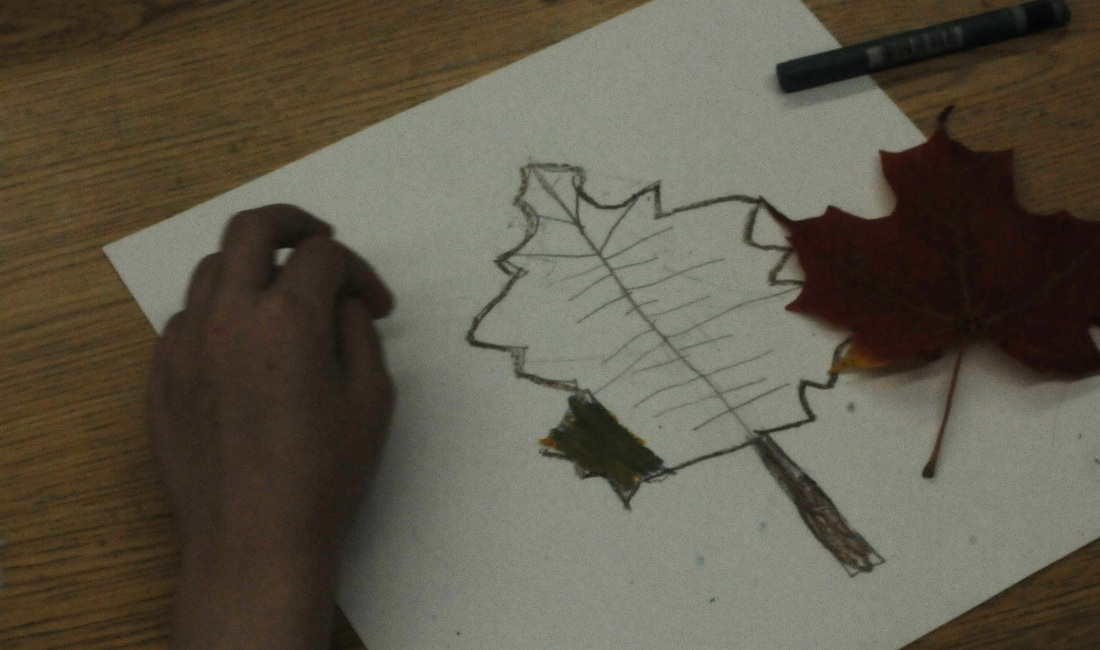 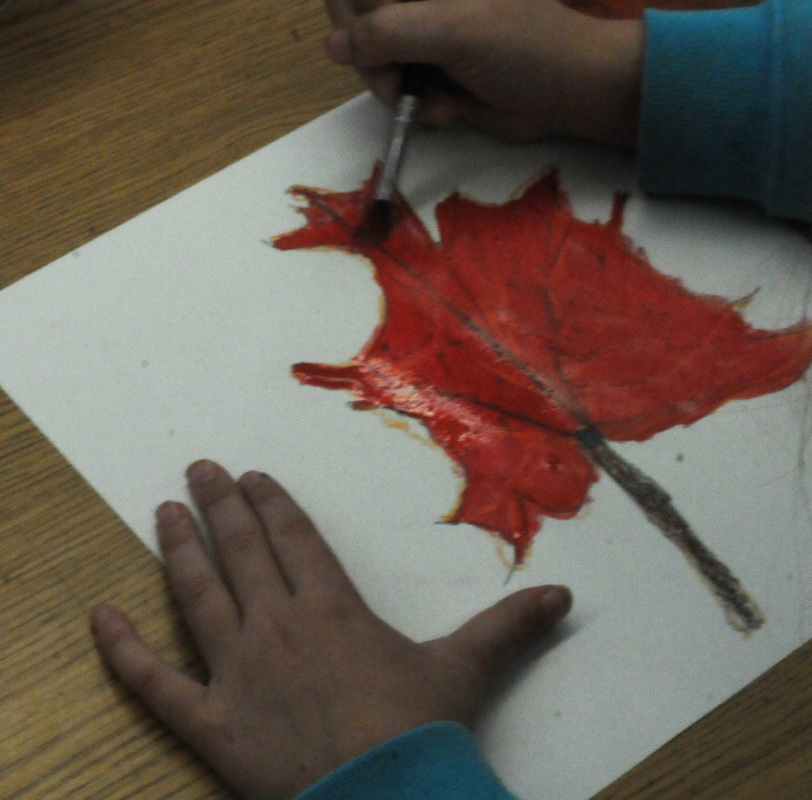 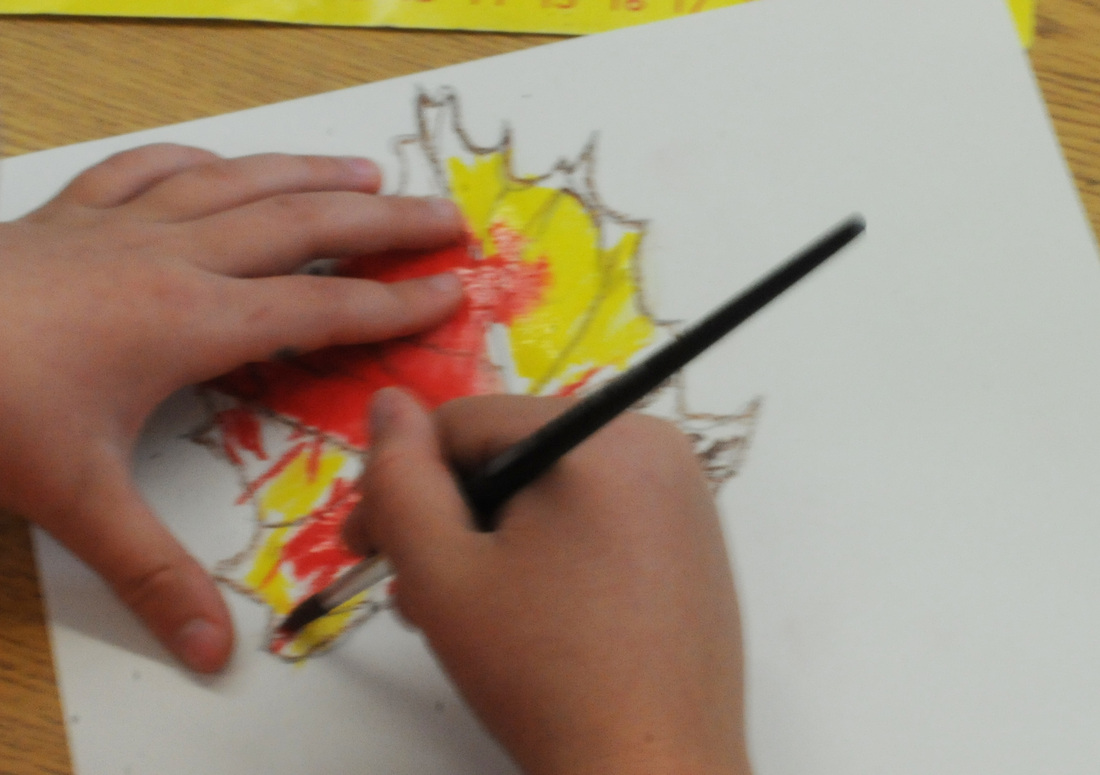 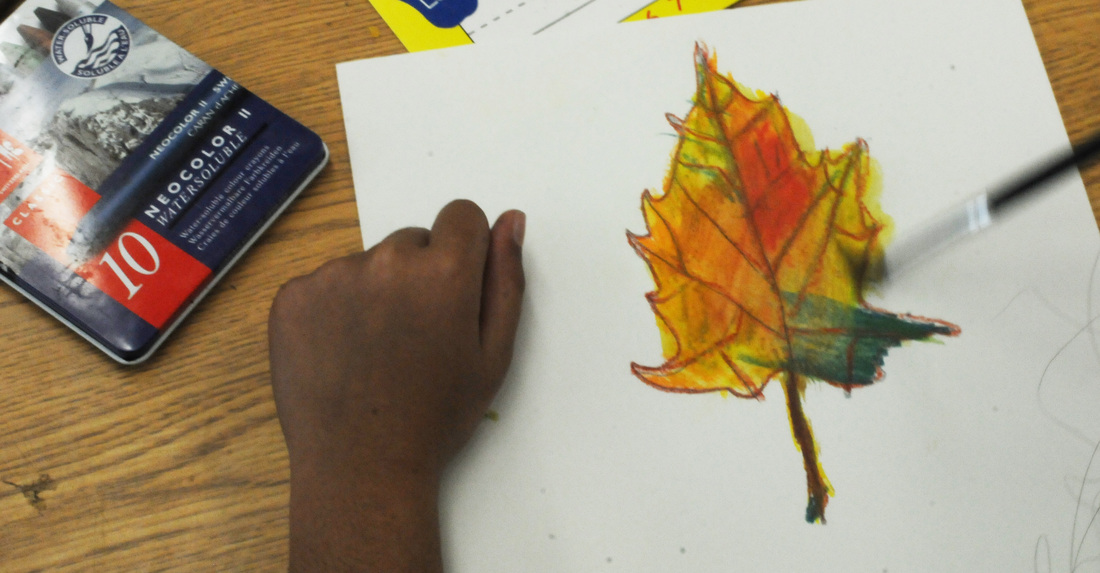 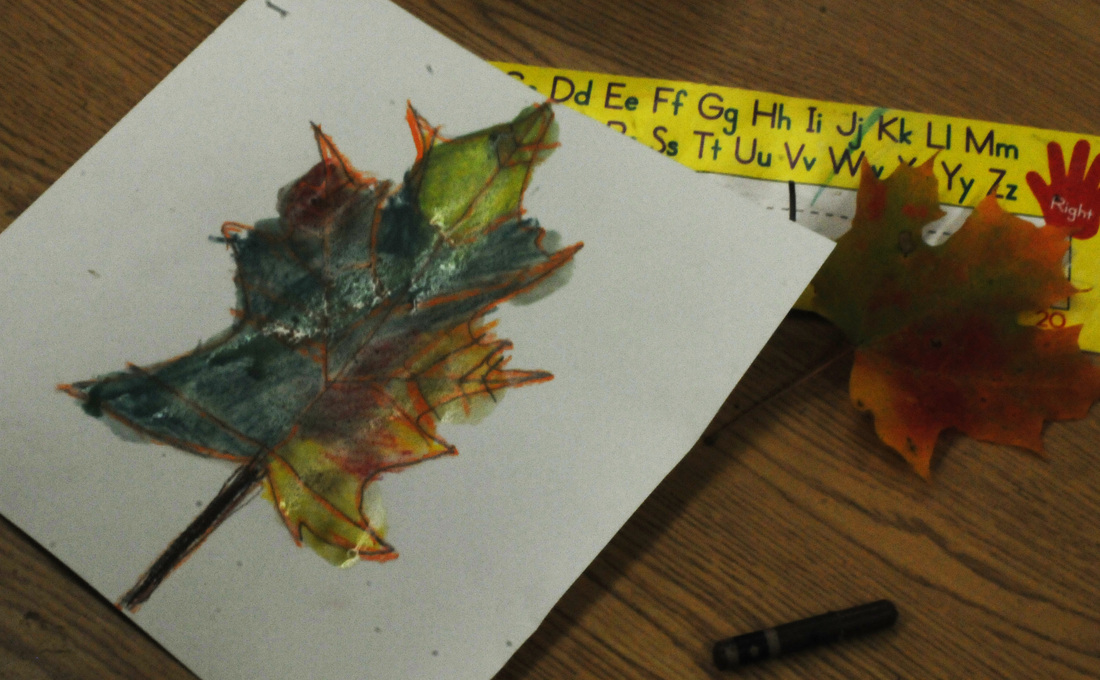 Fantastic job, first graders! I am so proud of your hard work, and you should be too. I hope you brought your leaves home and hung them up for everyone to enjoy (or maybe even mailed them to a relative)! 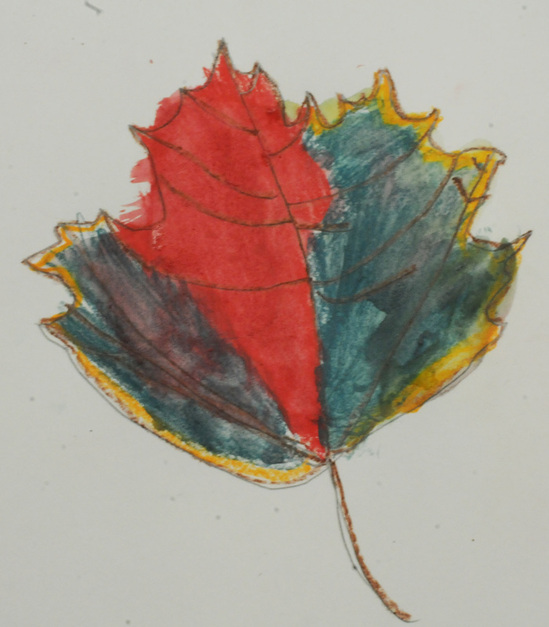 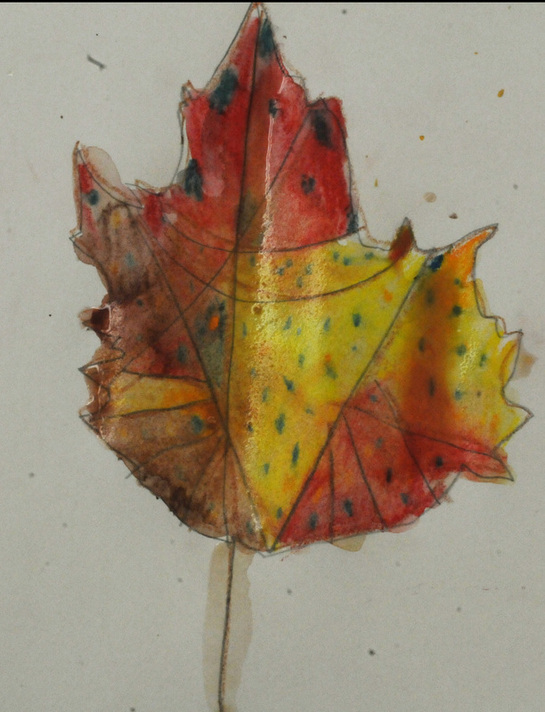 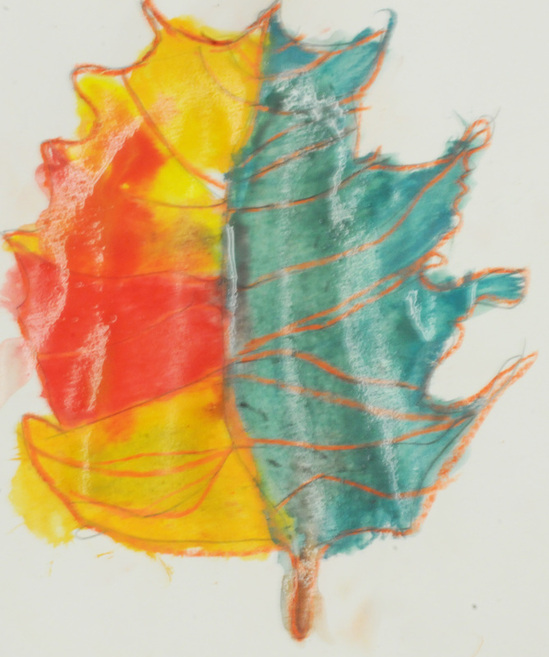 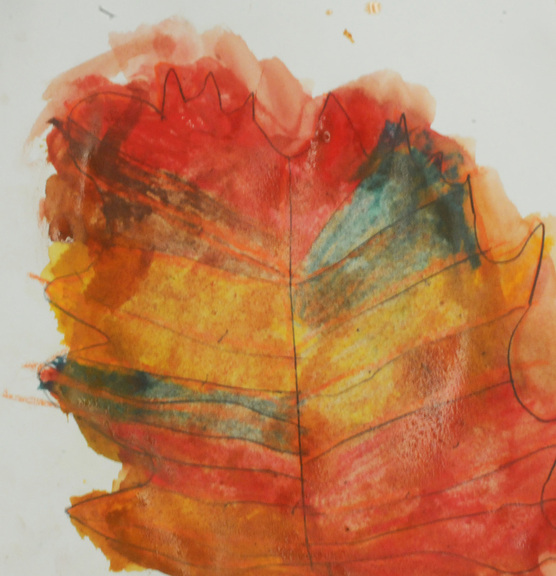 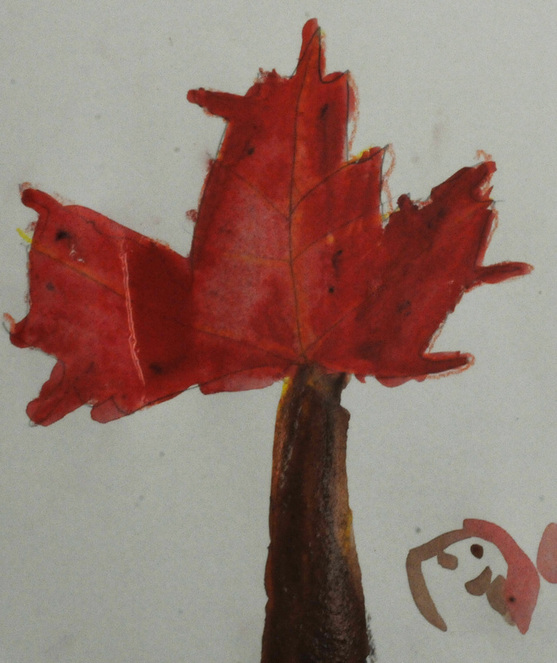 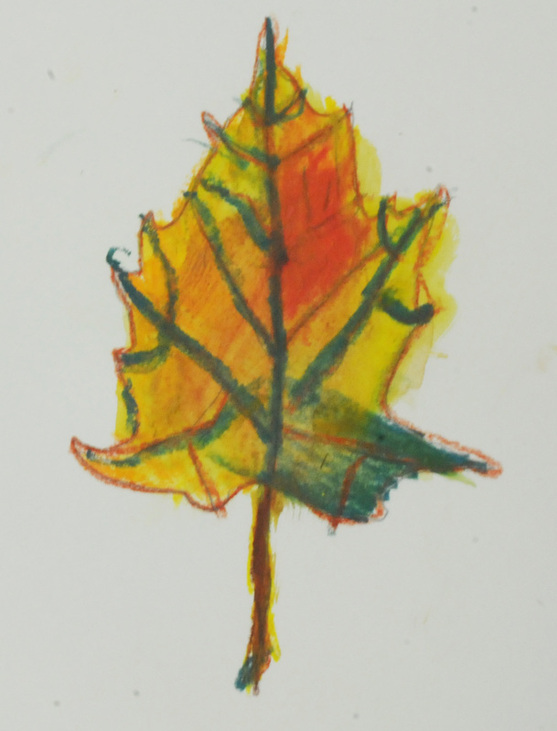 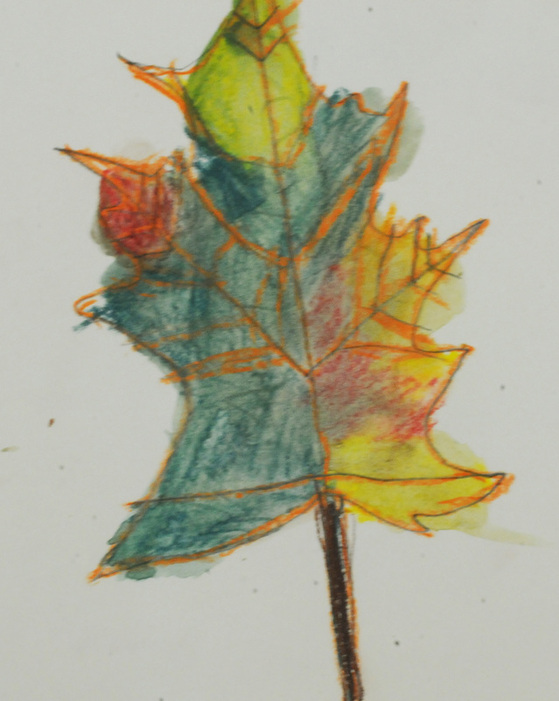  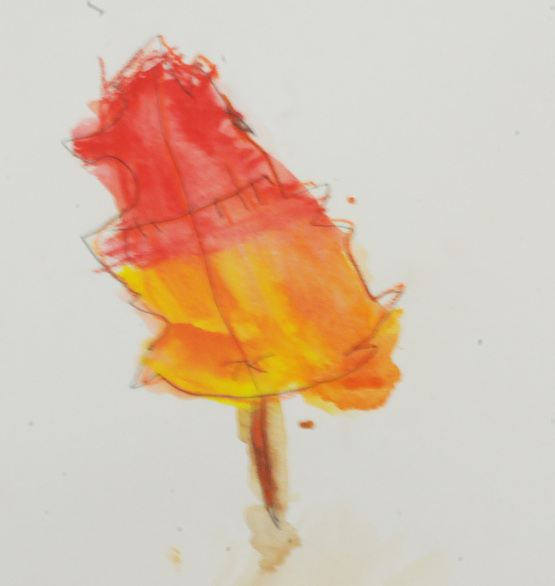 I can still remember my first day of First Grade at Fales school. I was so excited to walk into the room to see Mrs. Lalone, the teacher I had for Kindergarten. She had switched to First Grade over the summer, and I was going to have her again! I was so happy, and very lucky. I loved Mrs. Lalone. There was also something new about First Grade: we were going to have a different teacher who would just teach us about art! Her name was Miss Vigeant, and I really loved the days when she would come in with her cart full of art supplies. She always had something new and exciting to show us. I really loved First Grade, and I am so happy that you are here. I can't wait to create art with you. We are going to have a great year and will learn lots of fun and exciting things! Here is my school picture from First Grade... looks like I lost a tooth! 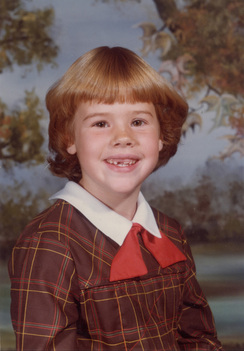 |